Vol.28 トリミングではない?!そんな多重露光の撮影方法<前編>
#double exposure #film swap #multiple exposure #フィルムカメラ #フィルムスワップ #フィルム写真 #多重露光 #撮影方法
<English follows Japanese>
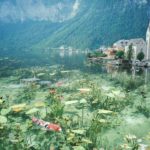
今回のブログでは、多重露光シリーズ「Magritte on Film」の撮影方法を初めて公開します!
Photoshopなどの画像加工でトリミングしたように見えるこのシリーズですが、実際には一切の加工を行っていません。すべては多重露光の特徴を最大限に生かした撮影によるものです。2回に分けて詳しく解説しますので、ぜひ最後までお楽しみください。

撮影を始めたきっかけ
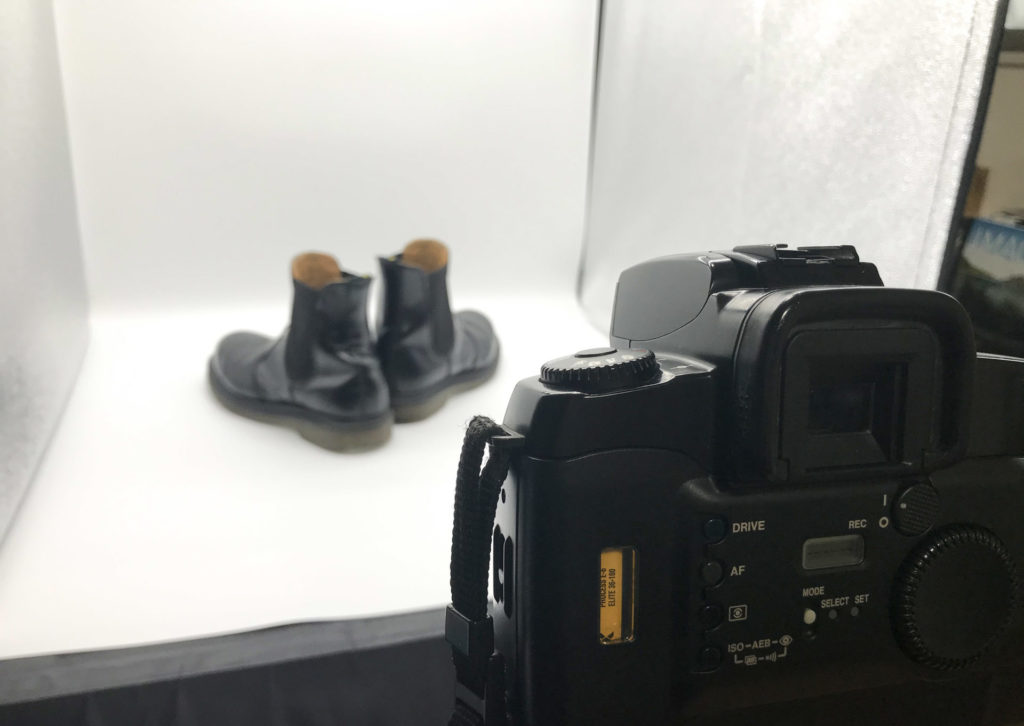
この作品が生まれたのは2020年、コロナ禍で緊急事態宣言が発出され、自由に撮影に出かけることができなくなった時期でした。「外出ができなくても作品づくりを続けたい」と考えた僕は、自宅や近所で撮影できるアイデアを模索していました。そこで思いついたのが、自宅にあった商品撮影用の撮影ボックスを使った多重露光でした。以前からイメージしていた企画でしたが、コロナ禍のおかげでついに形にすることになったのです。
なぜトリミングしたように見えるのか?
撮影方法を説明する前に、まずは「なぜトリミングしたような結果になるのか」を整理してみます。
以前のこちらのブログでも紹介しましたが、多重露光の大原則はとてもシンプルです。
「明るい被写体は暗い被写体の手前に見え、暗い被写体は明るい被写体に隠れる」
この特徴を応用することで、不思議なトリミング効果を生み出すことができるのです。
つまり、白色はもっとも明るく、黒色はもっとも暗い色。この性質を利用することが、このシリーズの撮影の秘密なのです。
ボトルを使った実例
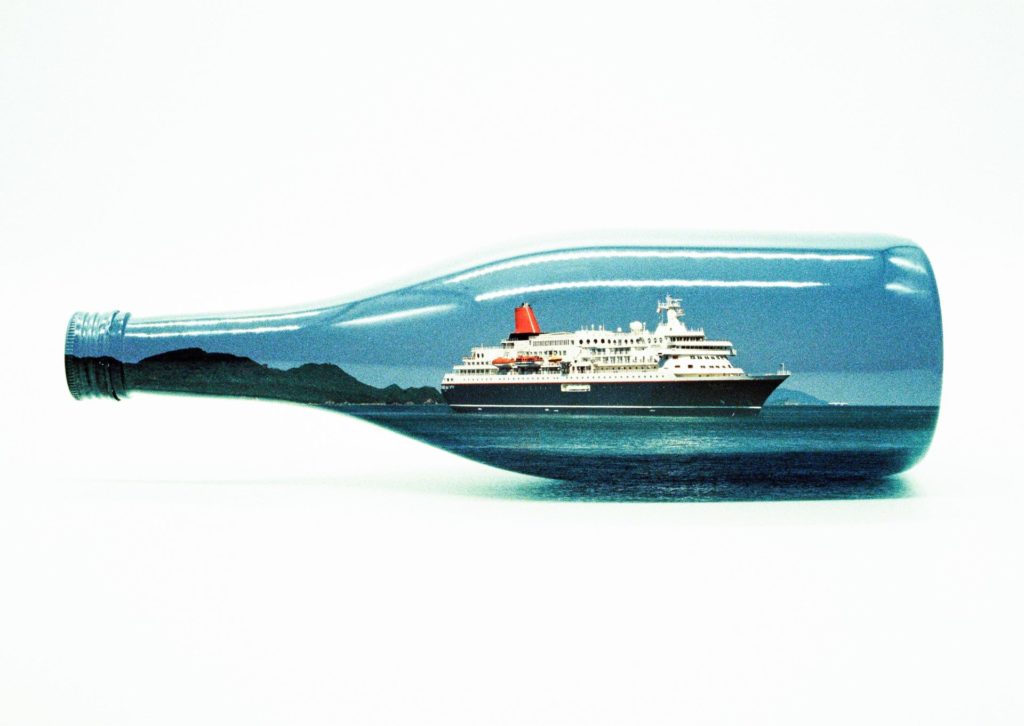
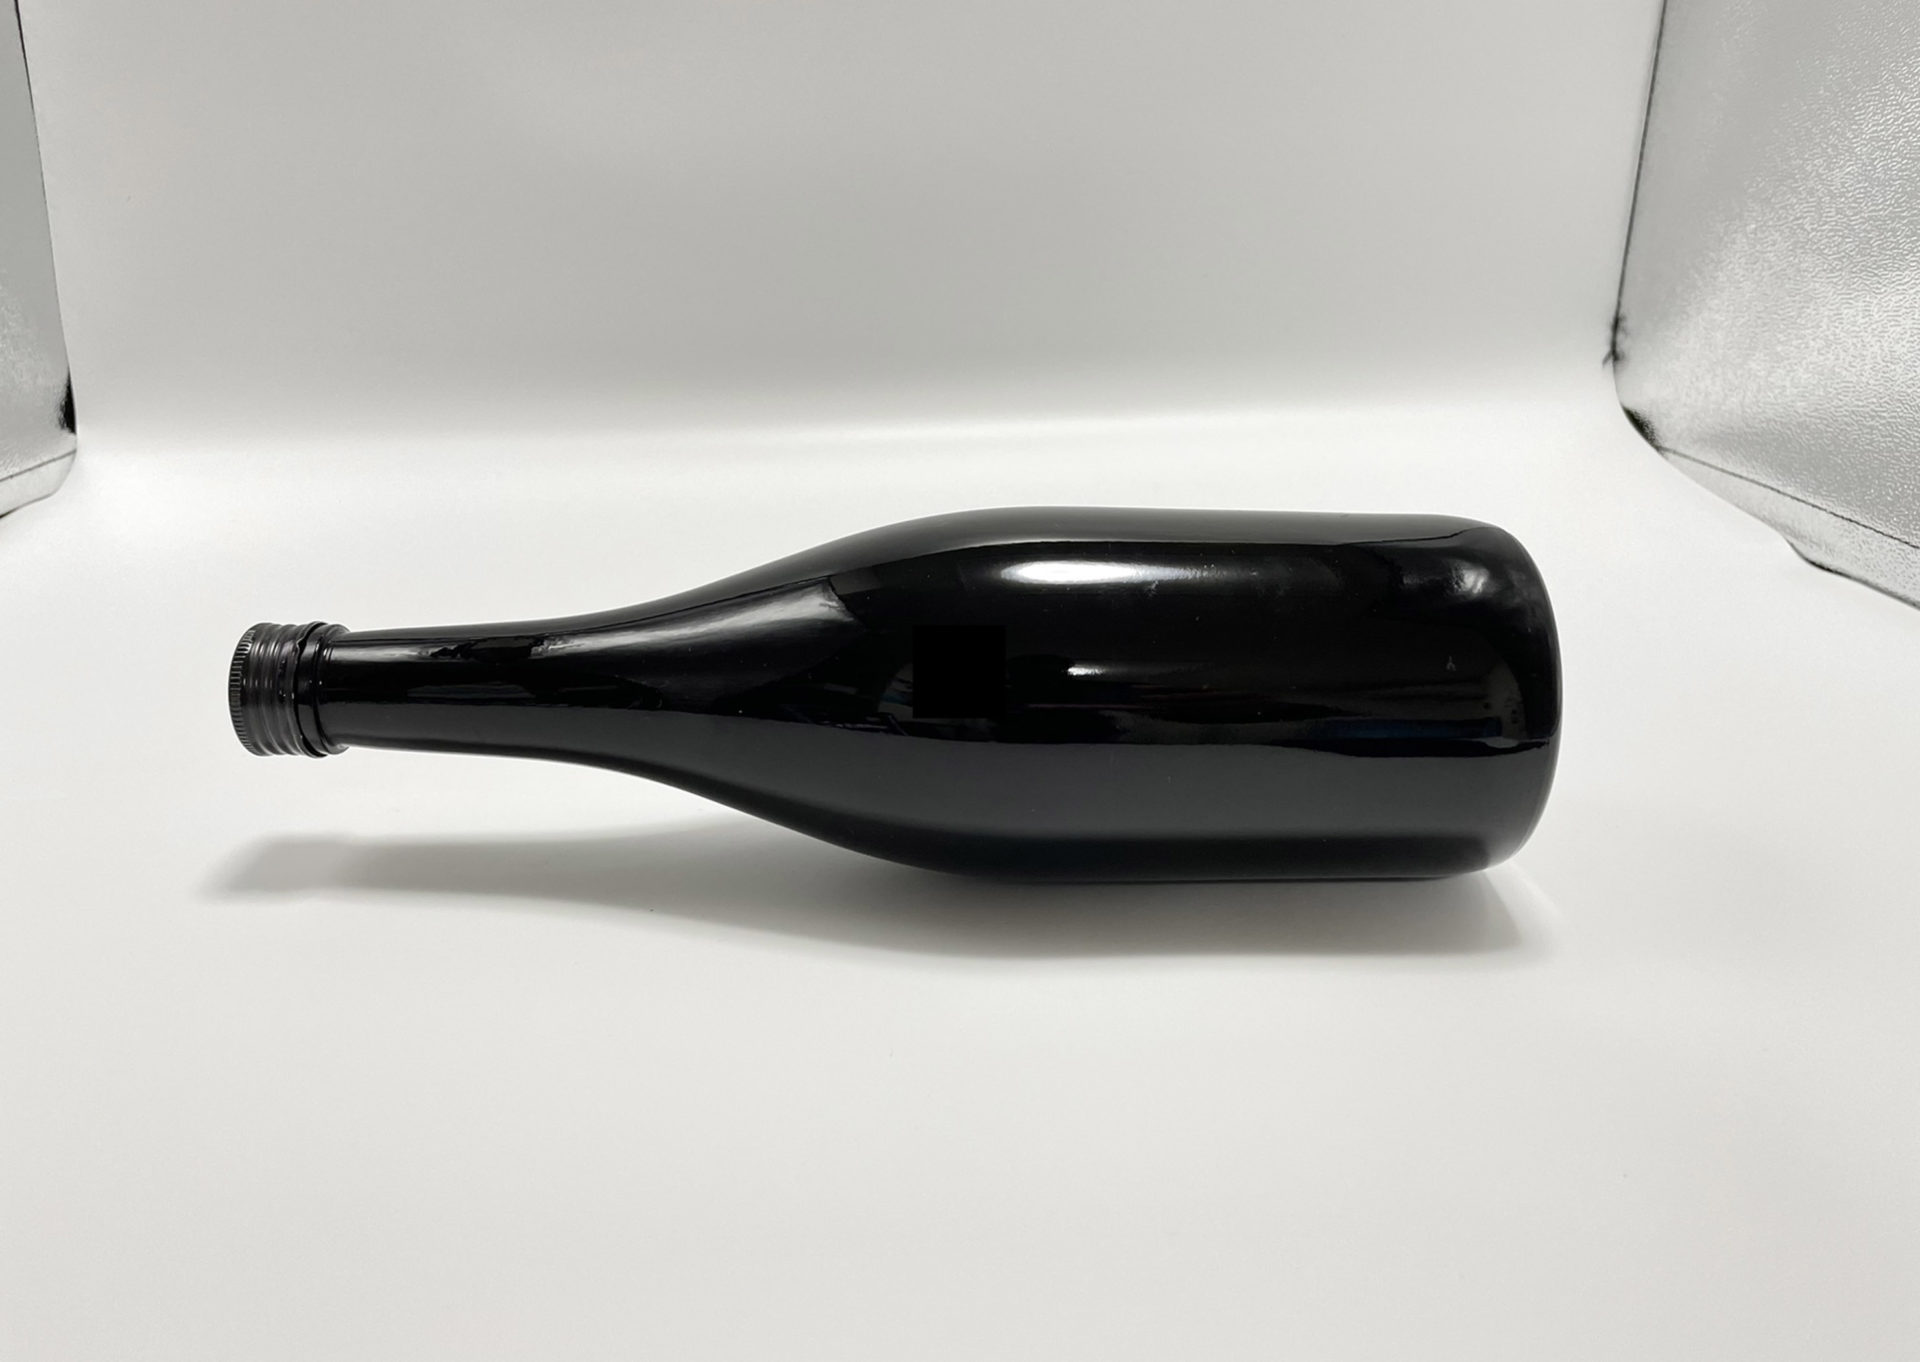
例えば上の写真は、黒色のボトルに景色を重ねた作品です。実はこのボトルはもともと明るめの色をしていたので、中に黒インクを入れて真っ黒にしました。さらに撮影ボックスの背景には白い紙を敷きます。すると多重露光で景色を重ねたとき、黒いボトル部分は「暗い部分」となるため、その上に景色の明るい部分が前面に現れます。一方で白い背景紙は空や海の色より明るいため、それらは背景紙の白色に隠れてしまいます。結果として、まるでボトルだけをきれいにトリミングしたような写真が完成するのです。
撮影手順
この撮影方法は「セルフフィルムスワップ」を用いて行います。(セルフフィルムスワップについては以前のこのブログをご覧ください。)
- 1回目の撮影
まずは風景を撮影します。このとき同時に「どの被写体(ボトルや帽子など)と重ねるか」を決めてメモしておきます。
先に被写体を撮影してしまうと、それに合う景色を順番通りに探す必要が出てしまい効率が悪いため、この順序がベストです。 - フィルムを巻き戻す
撮影後、フィルムを巻き戻して再びカメラに装填します。 - 2回目の撮影
撮影ボックスを使い、ボトルや帽子などの被写体を撮影します。もともと黒色でないグラスを使う場合は、アイスコーヒーなど黒い液体を注いで「暗い部分」をつくり、景色がその部分に重なるように工夫します。 - 現像して仕上げ
全て撮影が終わったらフィルムを現像。こうして完成です。
どう見ても画像加工で切り抜いたように見える「Magritte on Film」シリーズですが、実際には多重露光の特徴を応用することで生み出された作品でした。
次回は、この撮影方法をさらに発展させ、自作のマスキングを使ったより複雑な多重露光の手法をご紹介します。どうぞお楽しみに!
この「Magritte on Film」シリーズはZINEとして現在好評販売中です!是非多重露光の不思議さを感じてください。
- 1,650円 [税込]
「Magritte on Film」— シュルレアリスムにインスパイアされた多重露光作品集(ZINE) ベルギーの画家ルネ・マグリットのシュルレアリスム作品に影響を受け、フィルムカメラで多重露光による新たな世界を表現したシリーズです。 シュルレアリスム運動は、不条理で非論理的な風景や、日常と非現実を融合させた場面を描くことが特徴です。これは私が追求する多重露光の概念と深く共鳴しています。 最初はマグリットの作品に登場する山高帽やワインボトル、青空に浮かぶ雲といった象徴的なモチーフを使って作品…

Vo.28 Not Trimming?! The Shooting Method of Multiple Exposure <Part 1>
In this blog, I will share for the very first time how I created my multiple exposure series “Magritte on Film.”
At first glance, this series may look as if the images were trimmed or edited in Photoshop, but in fact, not a single digital adjustment has been made. Every image was created purely through photography, making full use of the unique characteristics of multiple exposure.
I will explain the process in detail over two posts, so I hope you’ll enjoy reading until the end.
How This Series Began
The idea for this work was born in 2020, during the COVID-19 pandemic, when Japan was under a state of emergency and I could no longer freely go out to photograph.
Determined to keep creating even while staying at home, I began searching for ideas I could shoot in my room or nearby. That’s when I thought of using a product photography lightbox I already had at home for multiple exposure experiments. I had imagined such a project for some time, but the pandemic gave me the chance to finally make it a reality.
Why Do the Photos Look Trimmed?
Before explaining the shooting method, let’s first look at why the images appear as if they were carefully trimmed.
As I mentioned in a previous blog, the golden rule of multiple exposure is very simple:
“Bright subjects appear in front of darker subjects, and darker subjects are hidden behind brighter ones.”
By applying this principle, you can create a mysterious trimming effect. In other words, white is the brightest color, while black is the darkest. Making use of this property is the key secret behind this series.
Example with a Bottle
Take, for instance, the photo above, where a landscape is overlaid onto a black bottle.
Originally, the bottle was a lighter color, so I filled it with black ink to make it completely dark. Then, I placed a white sheet of paper in the background inside the lightbox.
When a landscape was overlaid through multiple exposure, the dark area of the bottle allowed the brighter parts of the scenery to appear clearly in front. Meanwhile, the white background paper was brighter than the sky or ocean, so those elements were hidden behind it.
As a result, the photo looks as though the bottle was perfectly trimmed out of the image.
Step-by-Step Shooting Method
This technique uses a method called “self film swap.” (For more details on self film swap, please refer to my earlier blog post.)
1st Exposure – Shooting the Landscape
First, I shoot the landscape. At the same time, I decide which subject (a bottle, a hat, etc.) will later be combined with it and make a note.
This order is important: if I shoot the subject first, I would then have to find a landscape to match it, which is far less efficient.
Rewinding the Film
After finishing the first exposure, I rewind the film and reload it into the camera.
2nd Exposure – Shooting the Object
Next, using the lightbox, I photograph the subject, such as a bottle or a hat. If the object is not originally black, such as a clear glass, I pour in a dark liquid like iced coffee to create a “dark area” where the landscape will later appear.
Developing the Film
Once both exposures are completed, I develop the film, and the final work is revealed.
Although the “Magritte on Film” series looks as though the subjects were cut out using digital editing, the effect was in fact achieved entirely by applying the fundamental characteristics of multiple exposure.
In the next post, I will introduce a more advanced approach, using handmade masking to create even more complex multiple exposure effects. Stay tuned!