Vol.31 ロモグラフィーの本気が詰まったLOMO MC-A (多重露光編)
#double exposure #lomo #Lomography #mc-a #mca #multiple exposure #splitzer #スプリッツァー #フィルムカメラ #フィルム写真 #ロモグラフィー #多重露光 #撮影方法
<English follows Japanese>
ロモグラフィーから新商品のLOMO MC-Aが2026年秋に発表されました。ロモジャパンより一般販売に先駆けてサンプル撮影のご依頼を頂き、撮影したレビューをロモグラフィーのマガジン記事としてこちらに寄稿をさせて頂きました。このブログではそのレビューを元に多重露光に関してもう少し深掘りをして2回に分けてこのカメラについて紹介したいと思います。
2回目の今回は多重露光の撮影方法について動画を交えて深掘りしてお伝えします。全体の印象を紹介した1回目のブログはこちらからご覧ください。

とても簡単!LOMO MC-A多重露光の撮影方法
LOMO MC-Aには多重露光の機能が備わっています(多重露光についてはこちらページをご覧ください)。多重露光はロモグラフィーのカメラの特徴の一つでもあり、楽しみの一つでもあります。ただ多重露光と言うと難しい印象がありますが、このカメラによる撮影方法はとても簡単です。その手順は下記の通りです。
①露出オーバー(撮影結果が明るくなりすぎる)を避けるために、ISO感度を多重露光用に変更。例えば2回重ねる場合はISO感度を2倍にします。具体的にはISO100のフィルムで撮影する場合はカメラのISO感度を200に設定します。このISO感度変更についてはこちらのブログで詳しく紹介しています。
②撮影距離、絞り、シャッタースピードの設定。
③1回目の撮影
④1回目の撮影後、カメラ上部の右上にある”MX”ボタンを一度押す。
⑤LCDディスプレに”MX”の表示がされているか確認。”MX”が表示されていれば2回目の撮影の準備ができています。
⑥2回目の撮影。2回目の撮影後にはLCDディスプレに表示されていた”MX”は消えます。
⑦フィルムを巻き上げて次の撮影ができるようにします。次の撮影を多重露光ではなく通常の撮影をする場合は、ISO感度を本来の設定に戻します。
上記の手順を動画でも確認してみましょう。
LOMO MC-Aによる多重露光はフルオートで撮影をすればISO感度の設定に気をつれば、”MX”ボタンを押すだけという、とても簡単な手順です。そのため何と何を重ねるかという多重露光のアイデアに集中できる素晴らしいカメラなのです!今まで多重露光に挑戦したことがない方には是非試してほしい機能の一つです。


Splitzer(スプリッツァー)を使った多重露光
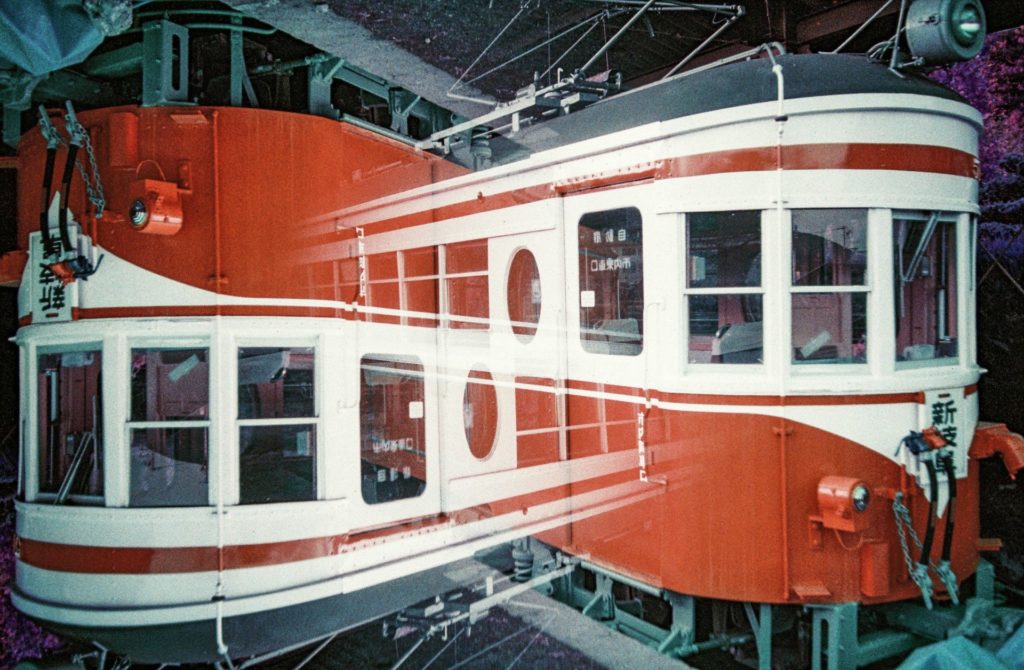
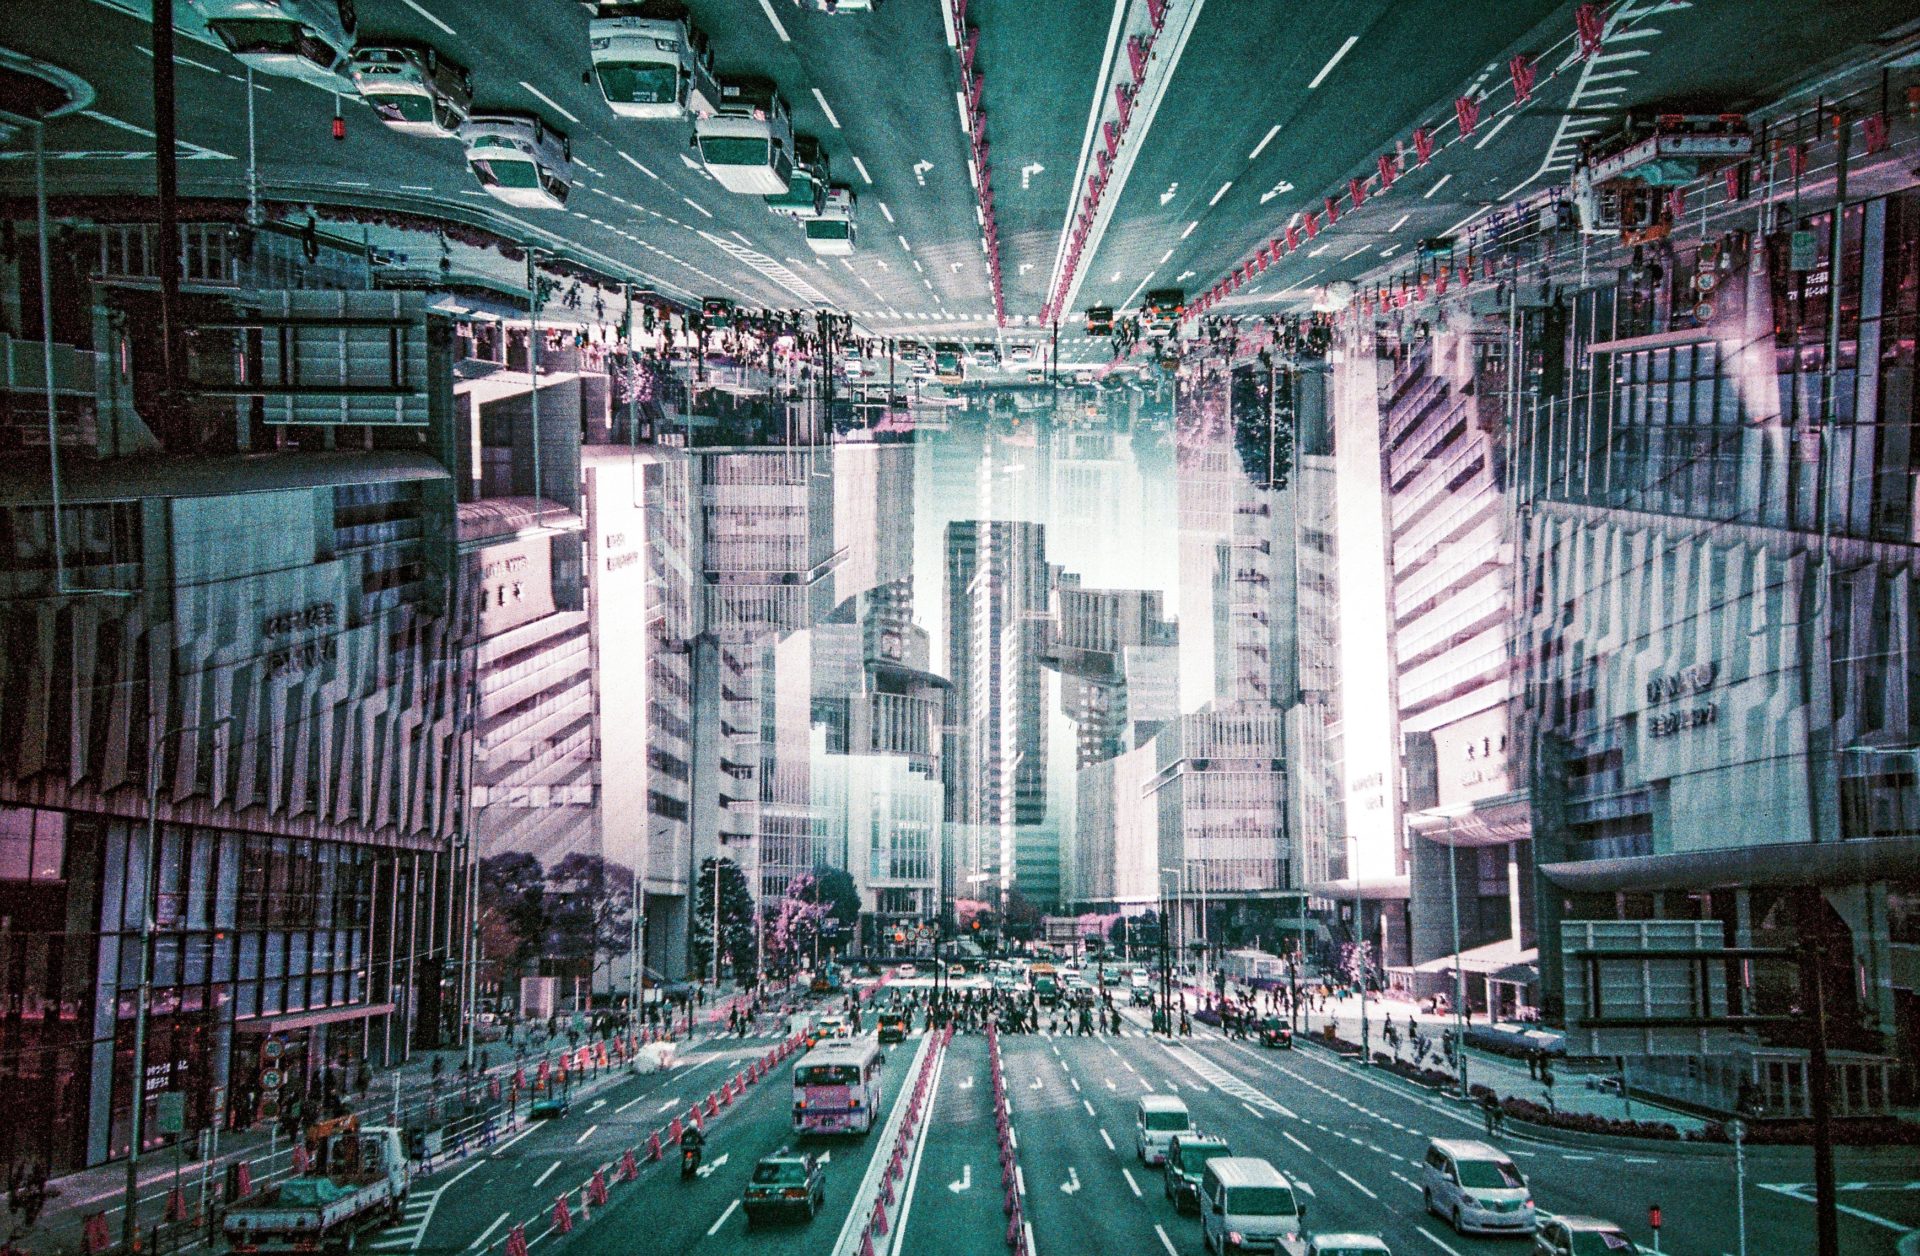
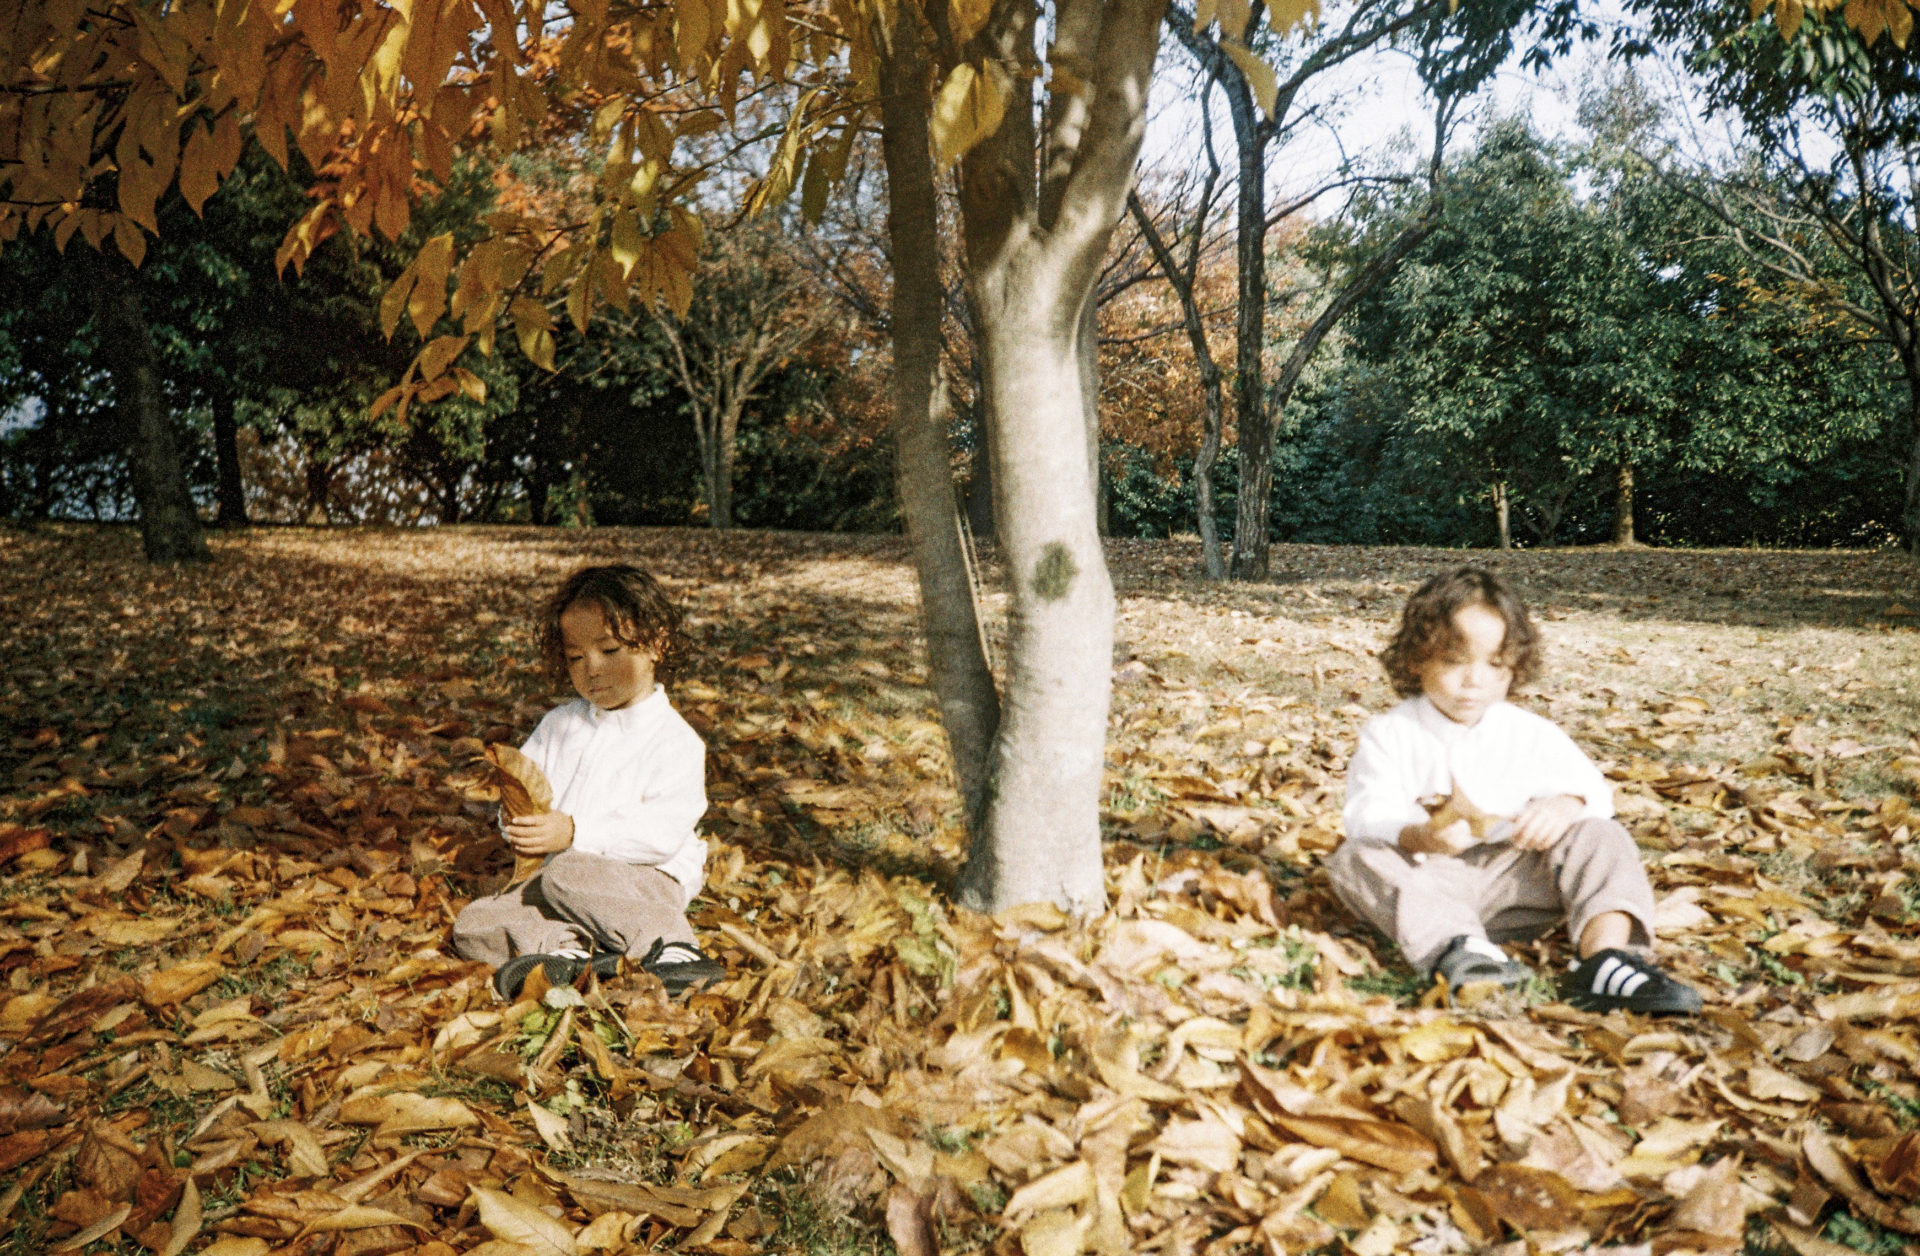
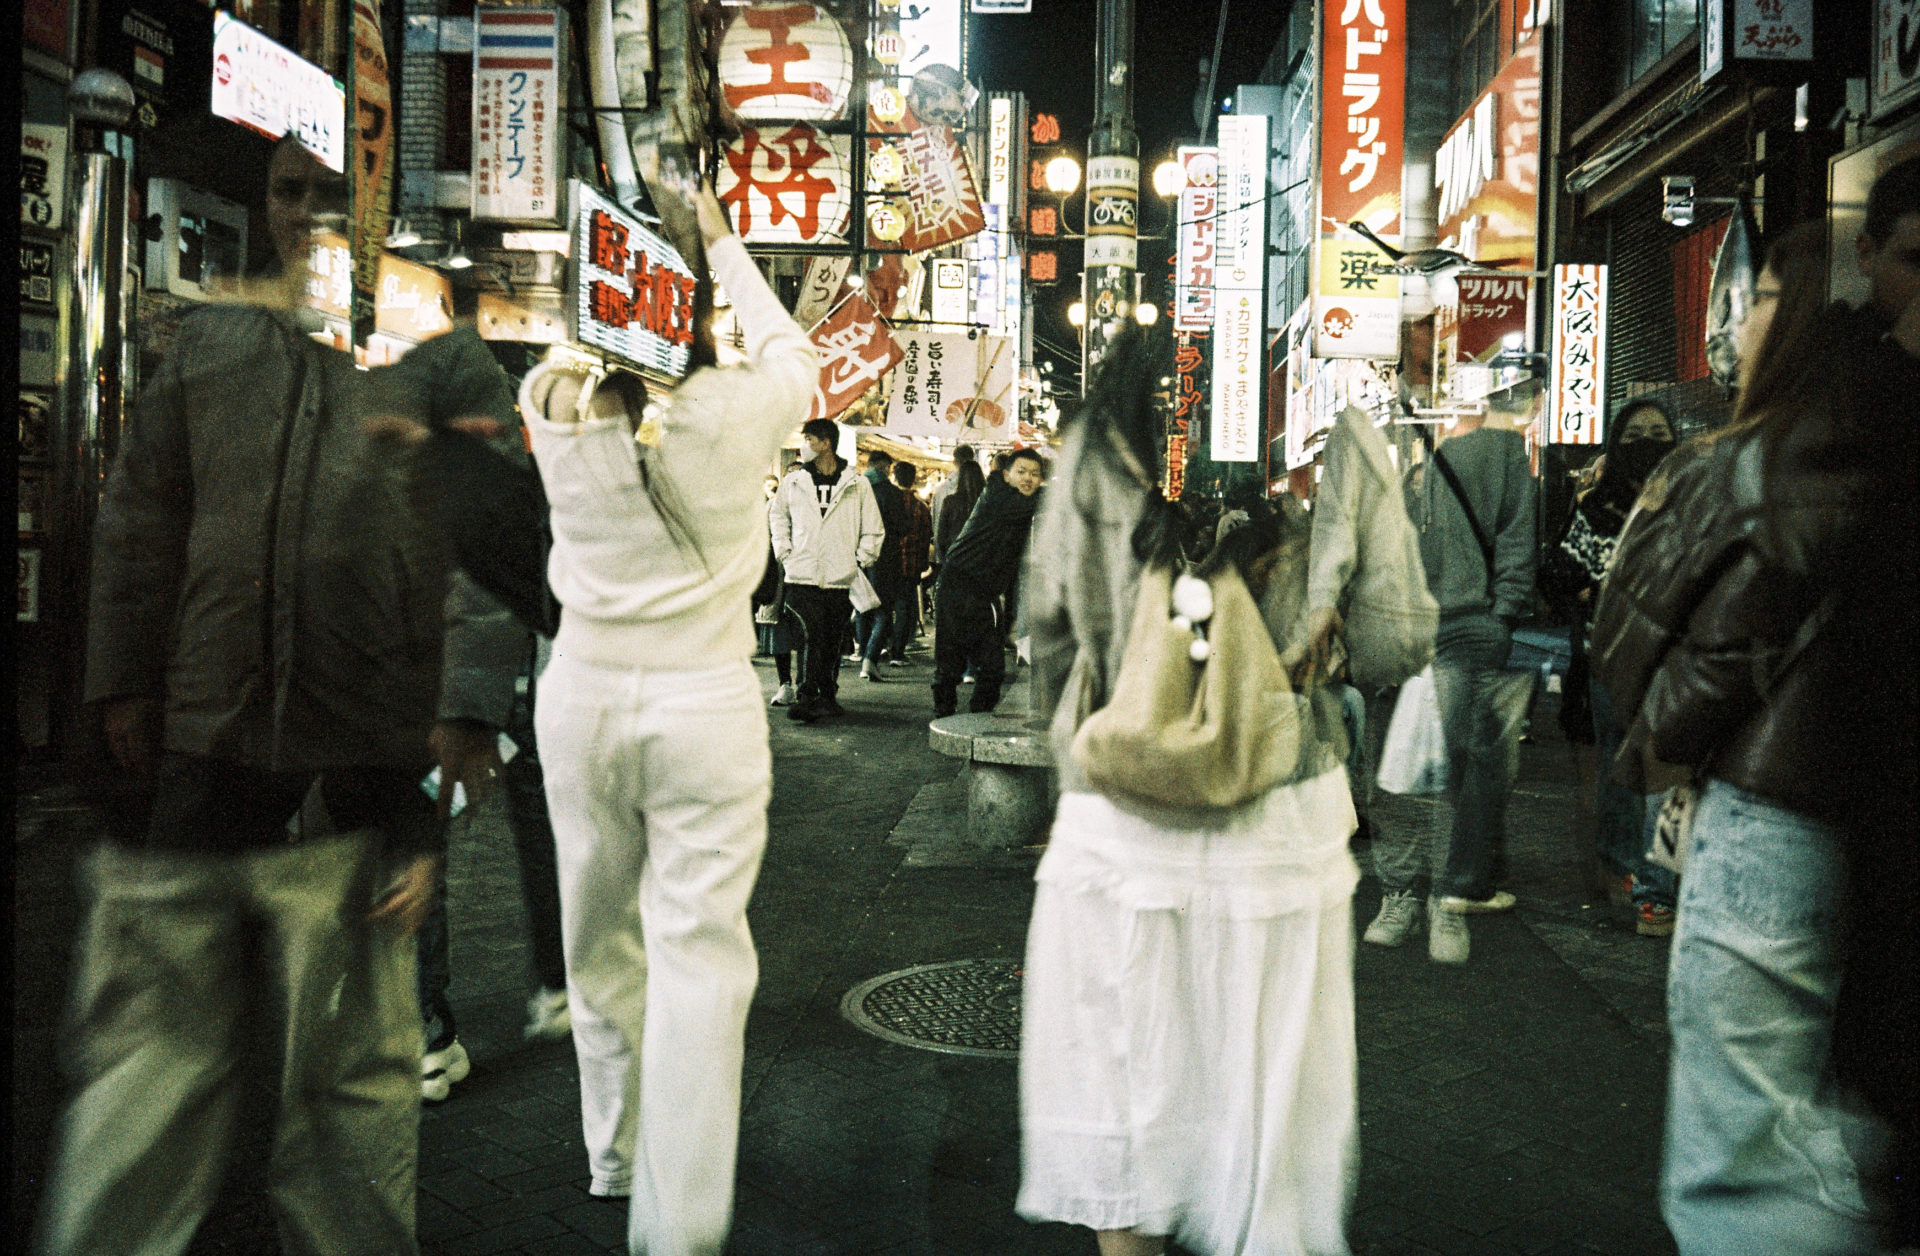
LOMO MC-Aには多重露光をさらに楽しむためにアクセサリー「Splitzer(スプリッツァー)」が付属で付いています。このSplitzerはレンズの一部をマスキングして撮影ができるアクセサリーです。例えば上下でレンズを2分割をしたり、左右でレンズを2分割して下の写真のような多重露光を撮影することができます。このSplitzerは他のカメラメーカーには無い特別なツールなので、是非試してもらいたいですね。その使い方は下記の通りです。
①レンズが収納されてカメラの電源がオフになっていることを確認。MCUレンズフィルターが装着されている場合は外す。
②スプリッツァーをレンズの前面に慎重にねじ込む。
③スプリッツァーを固定できたら外側のつまみを使用してレンズを覆うカバーの位置を調整。
④電源を入れ、フォーカスモード(AFまたはMF)と露出モード(プログラム、絞り優先、マニュアル)を選択。スプリッツァーはすべてのモードで動作します。
⑤ファインダーを覗いて構図を確認し1回目の撮影。ちなみに撮影の順番は結果には影響しません。
⑥シャッターを切った後にMXスイッチを押す。
⑦2回目の撮影の前にスプリッツァーのカバーを逆側に回転。例えば1回目の撮影で上半分を開けていた場合、2回目は下半分を開けます。
⑧ファインダーを覗いて構図を確認し2回目の撮影。
⑨フィルム送りレバーを使ってフィルムを送り、スプリッツァーを取り外し次の撮影の準備。
上記の手順を動画でも確認してみましょう。
スプリッツァーを使った多重露光を撮影する際の留意点
<Tips 1>
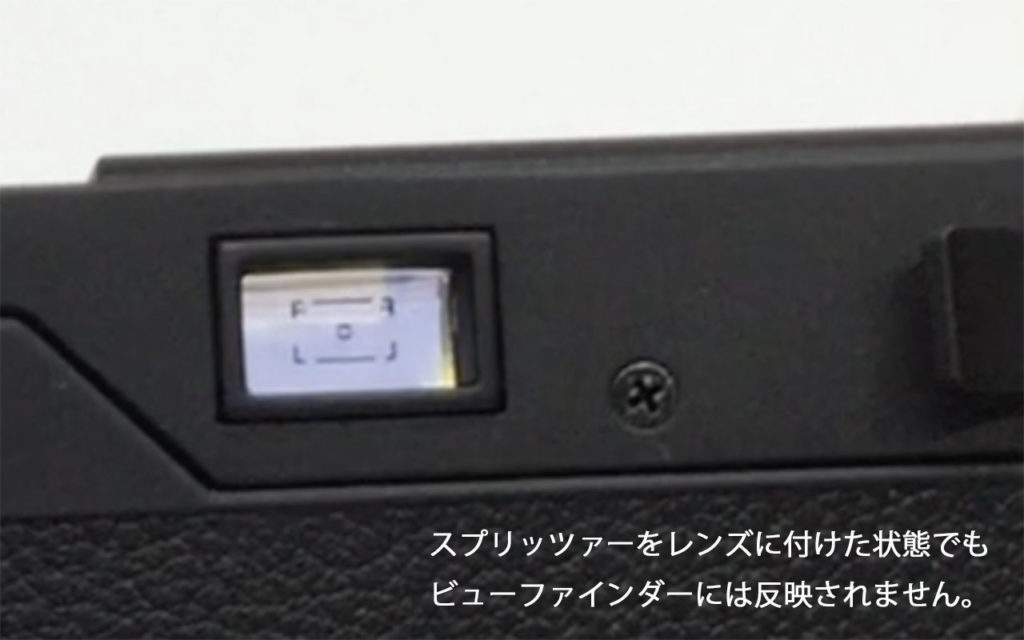
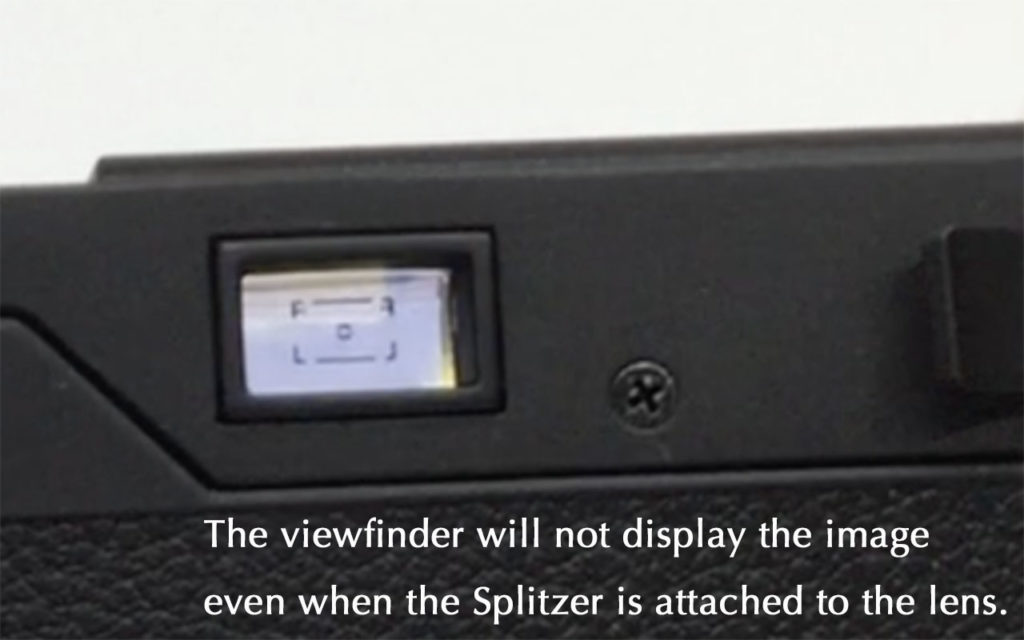
スプリッツァーをレンズに装着をしてもレンズとビューファインダーは連動をしていないために、ビューファインダーではレンズがスプリッツァーで覆われているようには見えません。例えばレンズの上半分をスプリッツァーで覆っていても、ビューファインダーでは通常通り全面で見えています。そのためにどれほどスプリッツァーで覆われるかはご自身でイメージする必要があります。
<Tips 2>
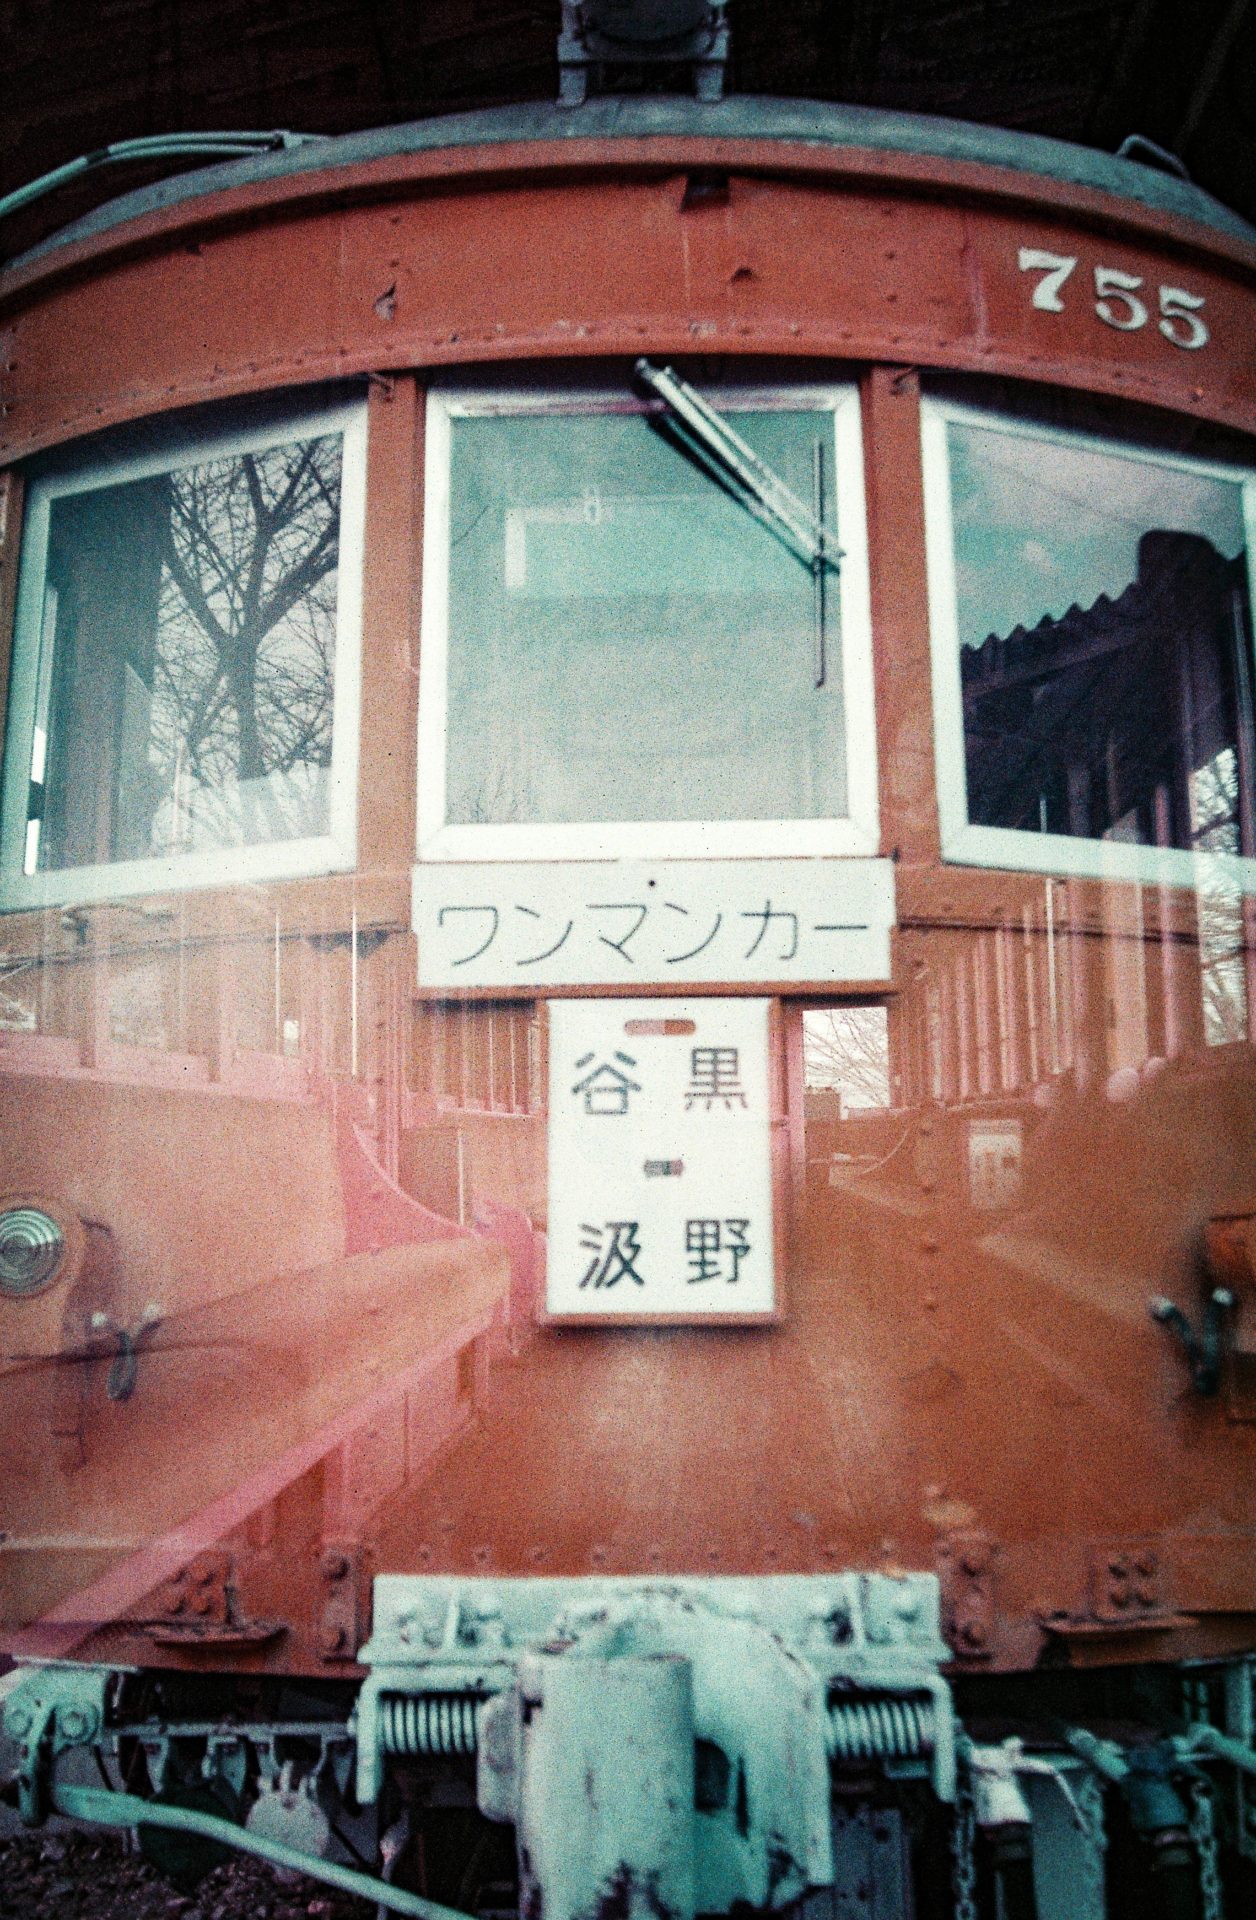
スプリッツァーでレンズを上下や左右で2分割をしても、実際にはそれぞれ半分以上に露光されます。下の写真をご覧ください。この写真はレンズの左半分をスプリッツァーで覆って撮影しましたが、右半分が中心よりもやや左半分まで写り込んでいます。
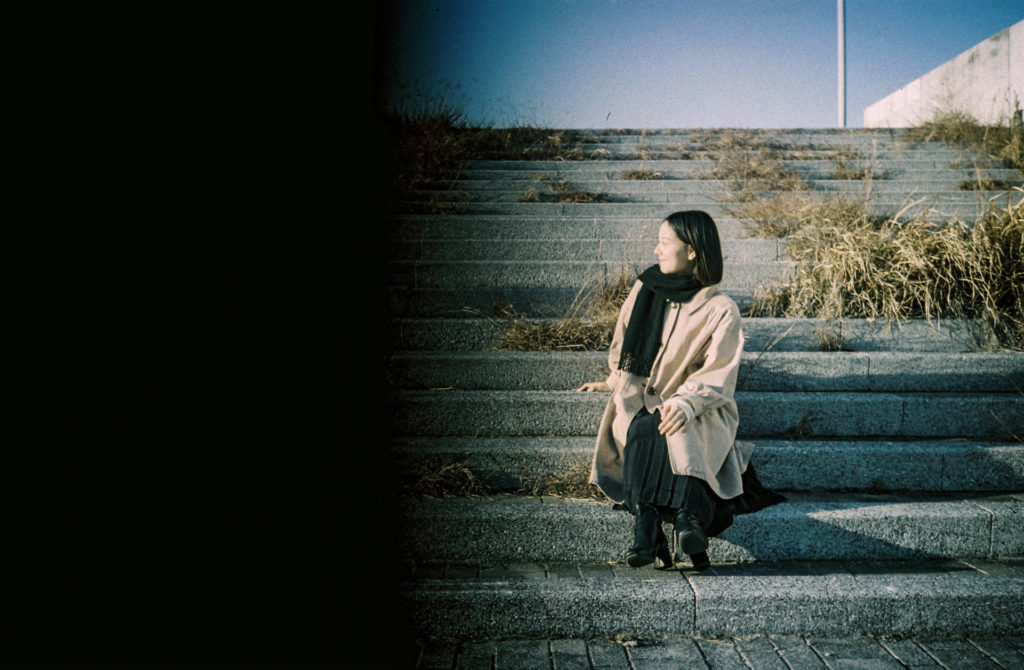
ということでちょうど真ん中あたりは両方ともがグラデーションのように混ざり合います。その特徴を活かした多重露光が下の写真です。
<Tips 3>
このスプリッツァーのレンズを覆うカバーは固定されないのでとても動きやすくなっています。そのため撮影前に少しでもスプリッツァーに触れるとカバーが動いてしまう可能性があります。そうすると未露光の部分が発生したり、イメージ通りに撮影できなくなるので慎重に撮影をしましょう。
さていかがでしたでしょうか?LOMO MC-Aでの多重露光の撮影方法はとても簡単なので、気軽に楽しめると思います。多重露光はロモグラフィーのカメラの楽しさの一つなので是非トライしてみましょう!LOMO ON!!
LOMO MC-A — Lomography’s Most Serious Camera Yet(Multiple exposure)
Lomography announced its new camera, the LOMO MC-A, in the autumn of 2026. Ahead of its general release, I was invited by Lomography Japan to shoot sample images, and my review was contributed as an article to Lomography’s official magazine.
In this blog, based on that review, I’d like to dive a little deeper into multiple exposure photography and introduce this camera in two parts.
In this second installment, I’ll take a closer look at how to shoot multiple exposures, accompanied by video explanations. You can read the first post, which covers my overall impressions of the camera, via this link.
How to Shoot Multiple Exposures with the LOMO MC-A
The LOMO MC-A is equipped with a multiple exposure function. Multiple exposure is one of the defining features of Lomography cameras—and one of their greatest joys. While it may sound complicated at first, the actual shooting process with this camera is surprisingly simple.
Here are the basic steps:
- To avoid overexposure (images becoming too bright), adjust the ISO setting for multiple exposure shooting. For example, if you plan to expose twice, set the ISO to double the film speed. When using ISO 100 film, set the camera’s ISO to 200. I explain this ISO adjustment in more detail in a separate blog post.
- Set the shooting distance, aperture, and shutter speed.
- Take the first shot.
- After the first shot, press the “MX” button once, located at the upper right on the top of the camera.
- Check the LCD display to confirm that “MX” is shown. If it appears, the camera is ready for the second exposure.
- Take the second shot. After this shot, the “MX” indicator on the LCD will disappear.
- Advance the film to prepare for the next shot. If your next frame is not a multiple exposure, return the ISO setting to its original value.
Let’s also take a look at these steps in the video.
When shooting multiple exposures with the LOMO MC-A in full auto mode, the process is incredibly simple—once the ISO is set correctly, all you need to do is press the “MX” button. This makes it a fantastic camera that allows you to fully concentrate on your creative ideas rather than technical settings. If you’ve never tried multiple exposure photography before, this is a feature I highly recommend exploring.
Multiple Exposure with the Splitzer
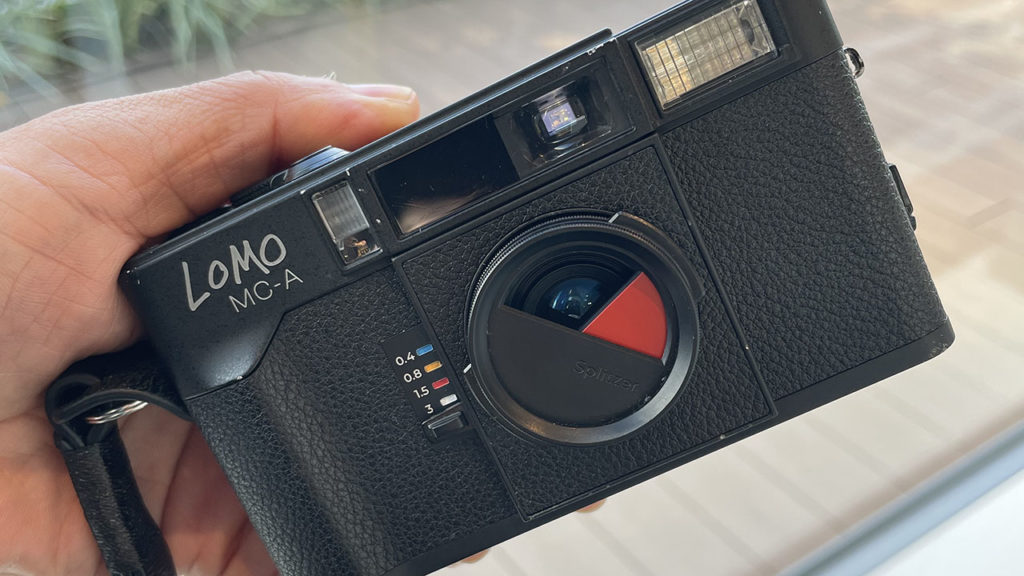
To further enhance the multiple exposure experience, the LOMO MC-A comes with a dedicated accessory called the Splitzer. The Splitzer is a masking tool that allows you to partially cover the lens while shooting. For example, you can divide the frame vertically or horizontally to create multiple exposures like those shown in the photos below.
This Splitzer is a unique tool not found in cameras from other manufacturers, and it’s definitely worth trying. Here’s how to use it:
- Make sure the lens is retracted and the camera is powered off. If an MCU lens filter is attached, remove it.
- Carefully screw the Splitzer onto the front of the lens.
- Once attached, use the outer knob to adjust the position of the masking cover.
- Turn the camera on and select the focus mode (AF or MF) and exposure mode (Program, Aperture Priority, or Manual). The Splitzer works in all modes.
- Look through the viewfinder, compose your shot, and take the first exposure. The order of exposures does not affect the final result.
- After pressing the shutter, press the MX switch.
- Before taking the second shot, rotate the Splitzer cover to the opposite side. For example, if the top half was exposed in the first shot, expose the bottom half for the second.
- Look through the viewfinder, compose, and take the second exposure.
- Advance the film using the film advance lever, remove the Splitzer, and prepare for the next shot.
You can also check these steps in the video.
Important Notes When Shooting with the Splitzer
<Tips 1>
Even when the Splitzer is attached to the lens, it does not affect what you see through the viewfinder. The viewfinder does not show the masked area. For example, even if the top half of the lens is covered, the viewfinder will still appear fully visible. This means you need to imagine how much of the lens is being masked.
<Tips 2>
When dividing the lens vertically or horizontally with the Splitzer, each exposure actually covers slightly more than half of the frame. As you can see in the photo below, even though the left half of the lens was masked, the exposed area extends slightly beyond the center. As a result, the middle area blends together like a gradient.
The photo below is a great example of using this characteristic effectively.
<Tips 3>
The masking cover of the Splitzer is not fixed and moves very easily. If you touch it even slightly before shooting, it may shift. This can result in unintended unexposed areas or images that don’t match your original idea, so be sure to handle it carefully.
So, what did you think?
Multiple exposure shooting with the LOMO MC-A is very simple and easy to enjoy. Since multiple exposure is one of the core pleasures of Lomography cameras, I highly encourage you to give it a try.
LOMO ON!!