
Vol.30 ロモグラフィーの本気が詰まったLOMO MC-A (全体の印象編)
#double exposure #lomo #Lomography #mc-a #mca #multiple exposure #splitzer #フィルムカメラ #フィルム写真 #ロモグラフィー #多重露光 #撮影方法
<English follows Japanese>
ロモグラフィーから新商品のLOMO MC-Aが2025年秋に発表されました。ロモジャパンから一般販売に先駆けてサンプル撮影のご依頼を頂き、撮影したレビューをロモグラフィーのマガジン記事としてこちらに寄稿をさせて頂きました。このブログではそのレビューを元に多重露光に関してもう少し深掘りをして2回に分けてこのカメラについて紹介したいと思います。
まず1回目はこのカメラの全体的な印象と今までのロモグラフィーのカメラにはなかった機能についてお伝えします。

私のLomo MC-Aの第一印象
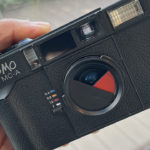
ケースから初めてMC-Aを取り出した瞬間、真っ先に浮かんだのは「ロモグラフィーがついに“本気のカメラ”を作ったんだ」という驚きでした。これまでのロモグラフィーのカメラは、遊び心や実験性が魅力で、いわゆる有名カメラメーカーとはあえて距離を取った存在という印象がありました。しかしMC-Aを目にした瞬間、そのイメージが大きく覆されました。「これは他メーカーと並べても遜色のない、ちゃんとしたカメラだ」それが正直な第一印象です。さらに説明書を読み進め、搭載されている機能を理解していくうちに、その驚きは確信へと変わっていきました。一般的なカメラユーザーが求める基本性能をしっかり押さえつつ、多重露光やSplitzer、カラーフラッシュといったロモグラフィーらしい表現機能もきちんと継承されている。「これはとんでもないカメラが登場したな…」そう感じて、自然と胸が高鳴ったのを覚えています。
MC-Aは3つのモード (プログラムオート / 絞り優先オート / マニュアル)を搭載
MC-Aにはロモグラフィーには今までになかったプログラムオート、絞り優先オート、マニュアルといった機能が搭載されました。それぞれの機能を使って特徴的な撮影にも挑戦してみました。
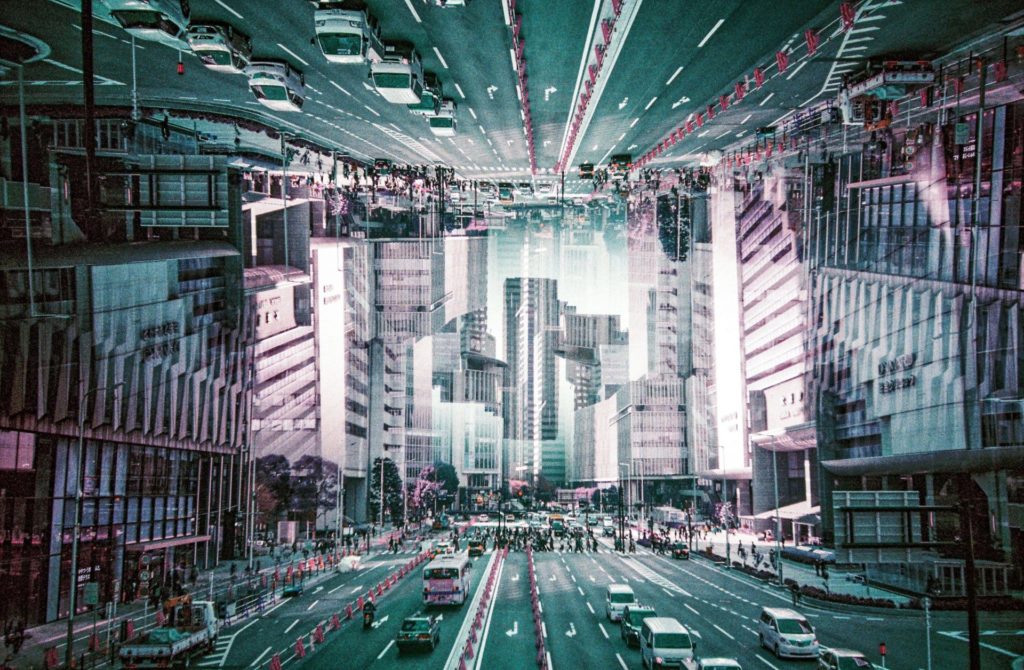
まずマニュアルモードではバルブ機能を使った長時間露光の撮影。撮影方法はシャッタースピードダイヤルを「B」に設定してシャッターを切るだけ。バルブ撮影中(長時間露光)にLCDディスプレイにシャッター時間(秒数)が表示されるため、感覚に頼らず正確に露光時間を把握できたのは非常に良かったです。ちなみにロモグラフィーではこのカメラ以外でLCDディスプレイが搭載されているものはありません。バルブ撮影をする際には三脚を使用しましょう。ちなみに下の観覧車の写真がそのバルブ機能を使った写真ですがシャタースピードは4秒です。
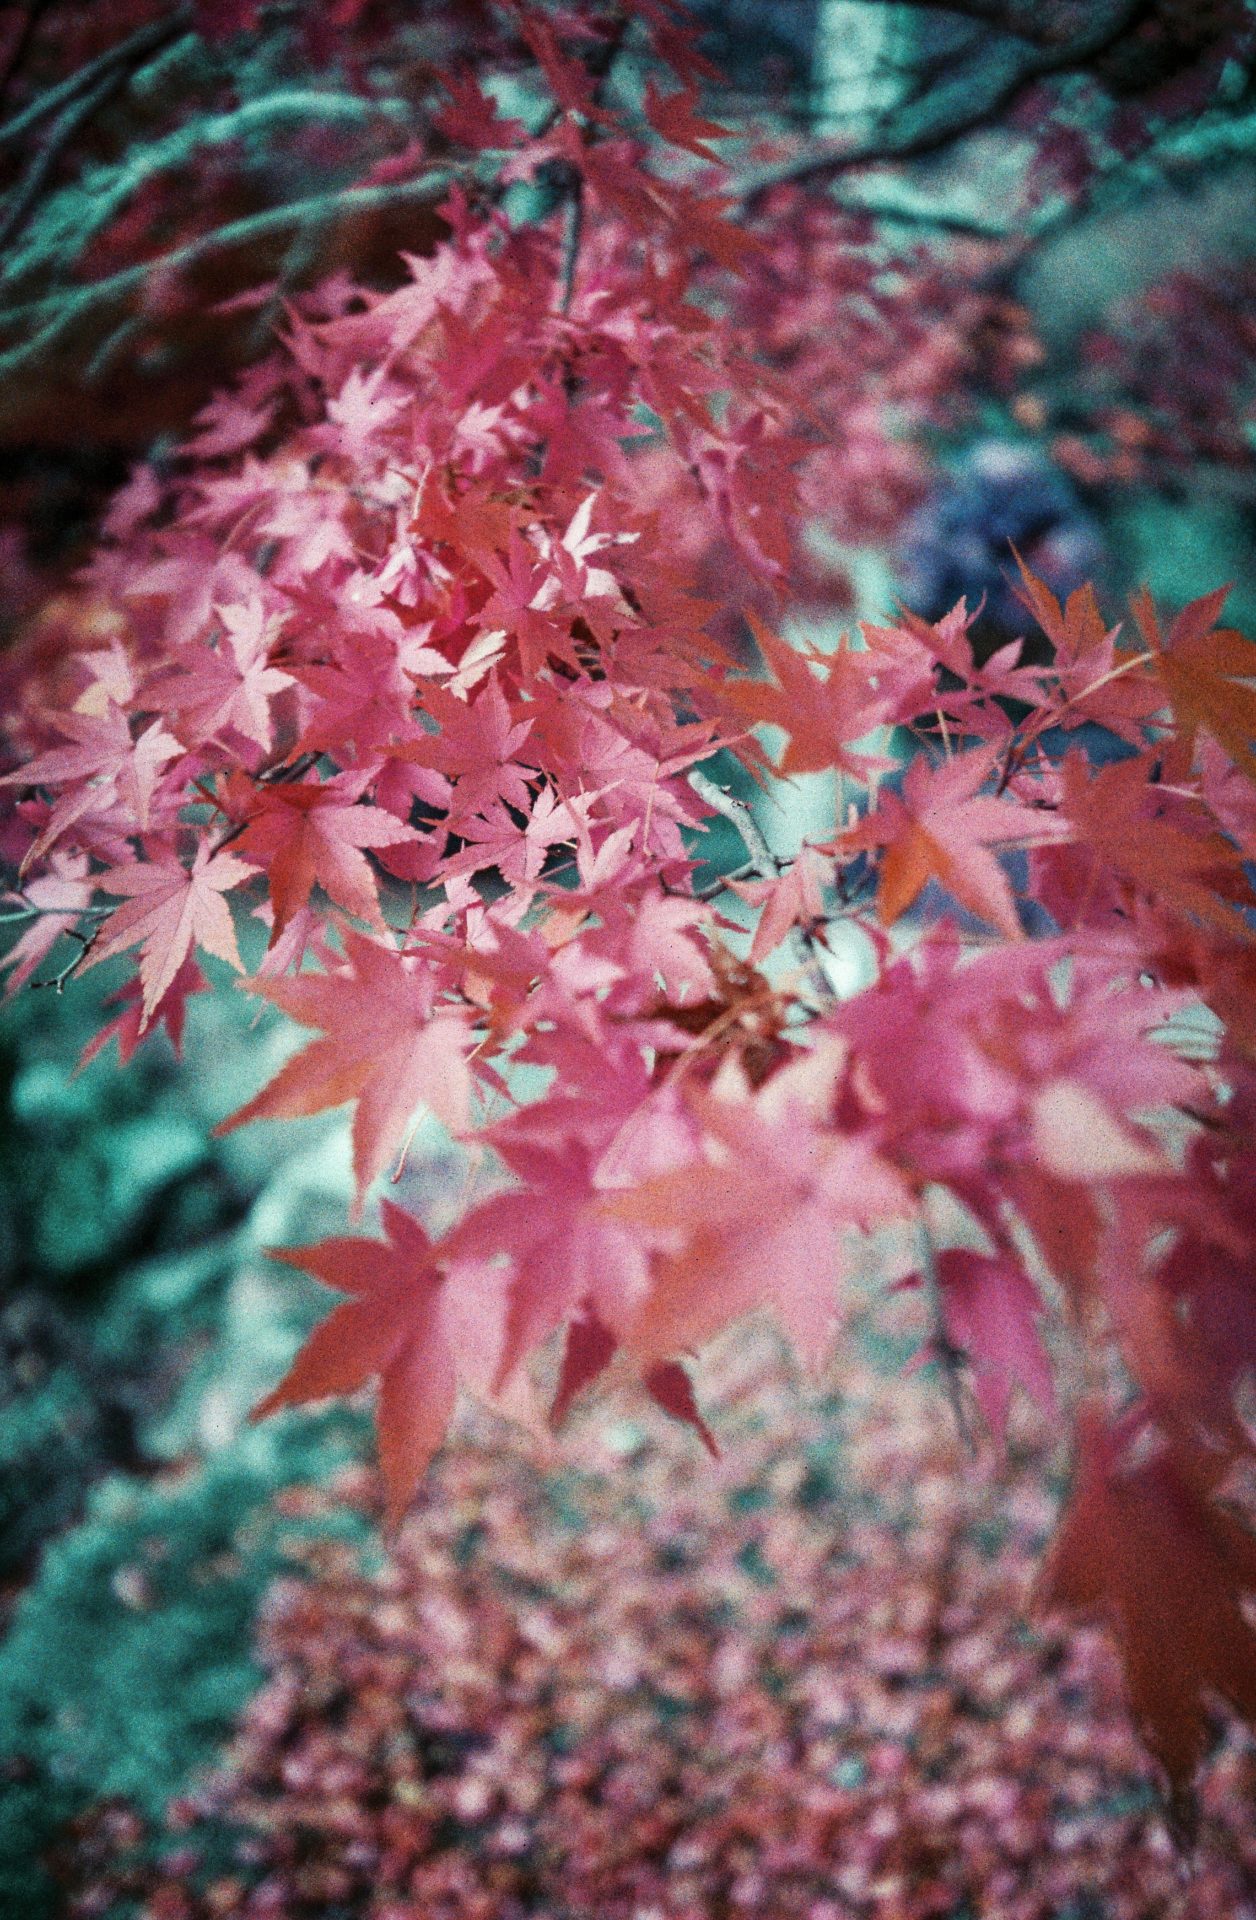
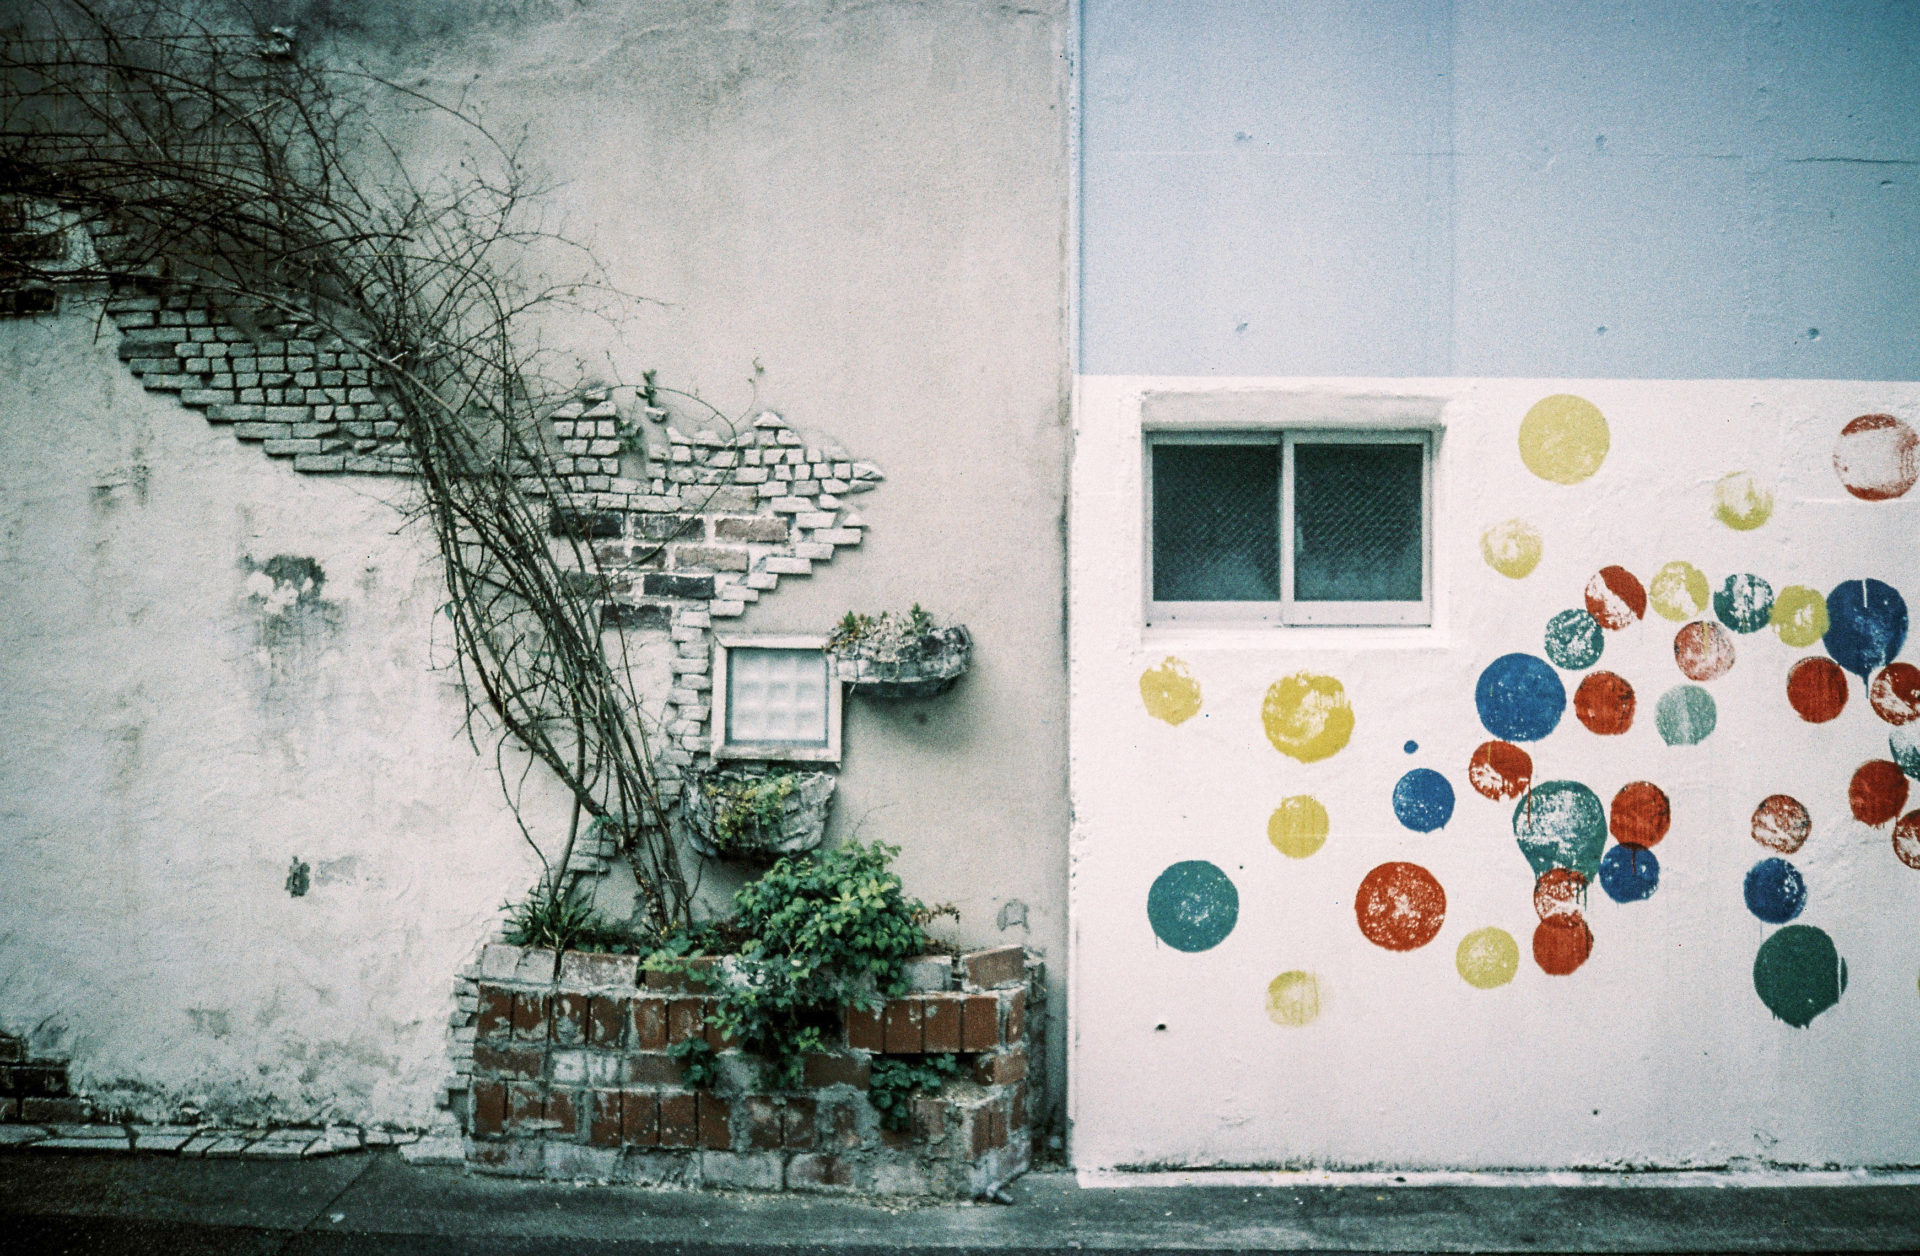
次に撮影時期がちょうど紅葉の美しい季節だったこともあり、絞り優先オートを使って背景を大胆にぼかした撮影も行いました。狙った通りにボケ量をコントロールでき、季節感のある印象的な写真をしっかり残すことができました。撮影方法はシャッタースピードダイヤルを「A」に設定し、絞りリングでF値をF2.8~16の間で設定します。
一方で今回のサンプル撮影では多重露光を中心に撮影したため、基本的にはプログラムオートを使うことが多かったです。私の場合、多重露光の撮影時は重ねるアイデア出しに集中しているので、露出をカメラに任せられるプログラムオートはとても相性が良いと感じました。プログラムオートの撮影方法はシャッタースピードダイヤルを「A」に設定し、絞りリングで「P」に設定します。

役に立った新機能
新しく搭載された機能はいろいろ試しましたが、実際の撮影で特に「これは良い」と感じたのは、次の3つです。
*内蔵フラッシュ
*LCDディスプレイ
*セルフタイマー
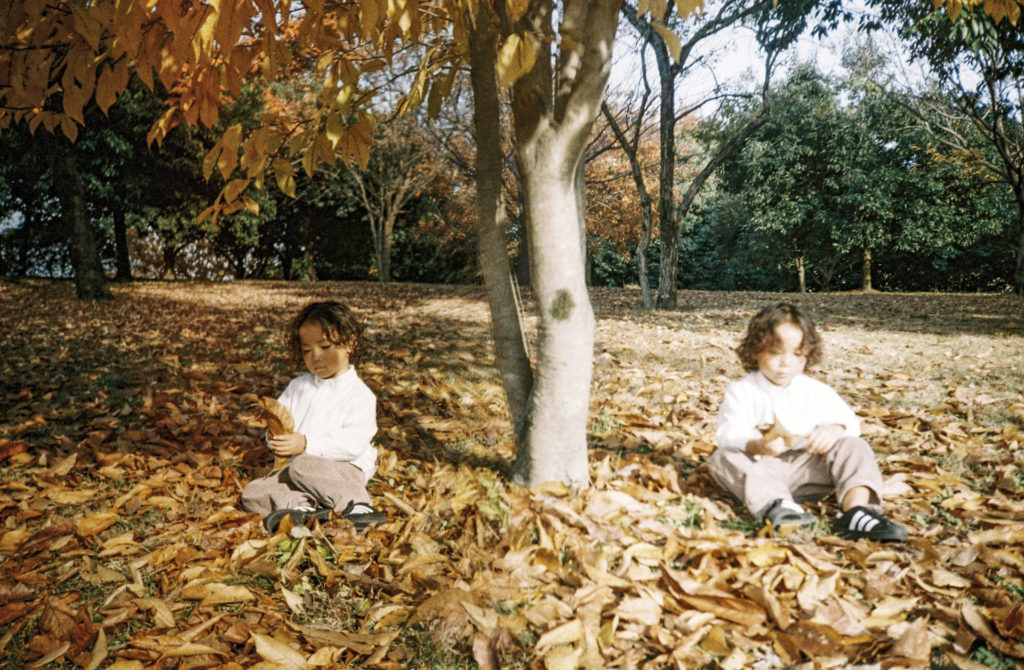
まず内蔵フラッシュは、人物撮影の場面で非常に重宝しました。LC-A+を使用する時は屋外撮影が多い私にとって、逆光や日陰はこれまで悩みの種でしたが、MC-Aの内蔵フラッシュのおかげで、そうした状況でもモデルの表情をしっかりと写すことができました。LC-A+では難しかったシーンに、安心して踏み込めるようになった印象です。


LCDディスプレイは、個人的にはかなり大きな進化だと感じています。特にフィルムカウンターが明確に表示される点は大きなメリットです。LC-A+ではやや曖昧だったフィルム枚数が一目で把握できるようになりました。僕はフィルムスワップによる多重露光をよく行い、「何枚目に何を撮ったか」を記録しながら撮影するのですが、その記録を取る際にもLCDディスプレイの存在がとても役に立ちそうです。
セルフタイマーも、さまざまなシーンで活躍する機能だと思います。集合写真はもちろん、自撮り撮影も可能ですし、手ブレが不安な場面ではシャッターを直接押さずに撮影できる安心感があります。フィルムカメラでありながら、撮影の自由度がしっかりと広がっていると感じました。
そして新機能というわけではありませんが、個人的にとても嬉しかったのが多重露光スイッチの配置です。MC-Aでは多重露光スイッチがカメラ上部に配置されており、これは多重露光を多用する僕にとって大きな改善点でした。LC-A+では多重露光スイッチが底部にあったため、三脚使用時にはシャッターを切るたびにカメラを外す必要がありました。その煩わしさが、MC-Aでは完全に解消されています。この変更だけでも「多重露光を本気で使う人のことをよく考えて作られている」と感じました。
今回のお気に入りの一枚
今回の撮影で特に気に入っているのが、以下の機能を組み合わせて撮影したこの一枚です。
*多重露光
*Splitzer
*セルフタイマー
*マニュアルフォーカス
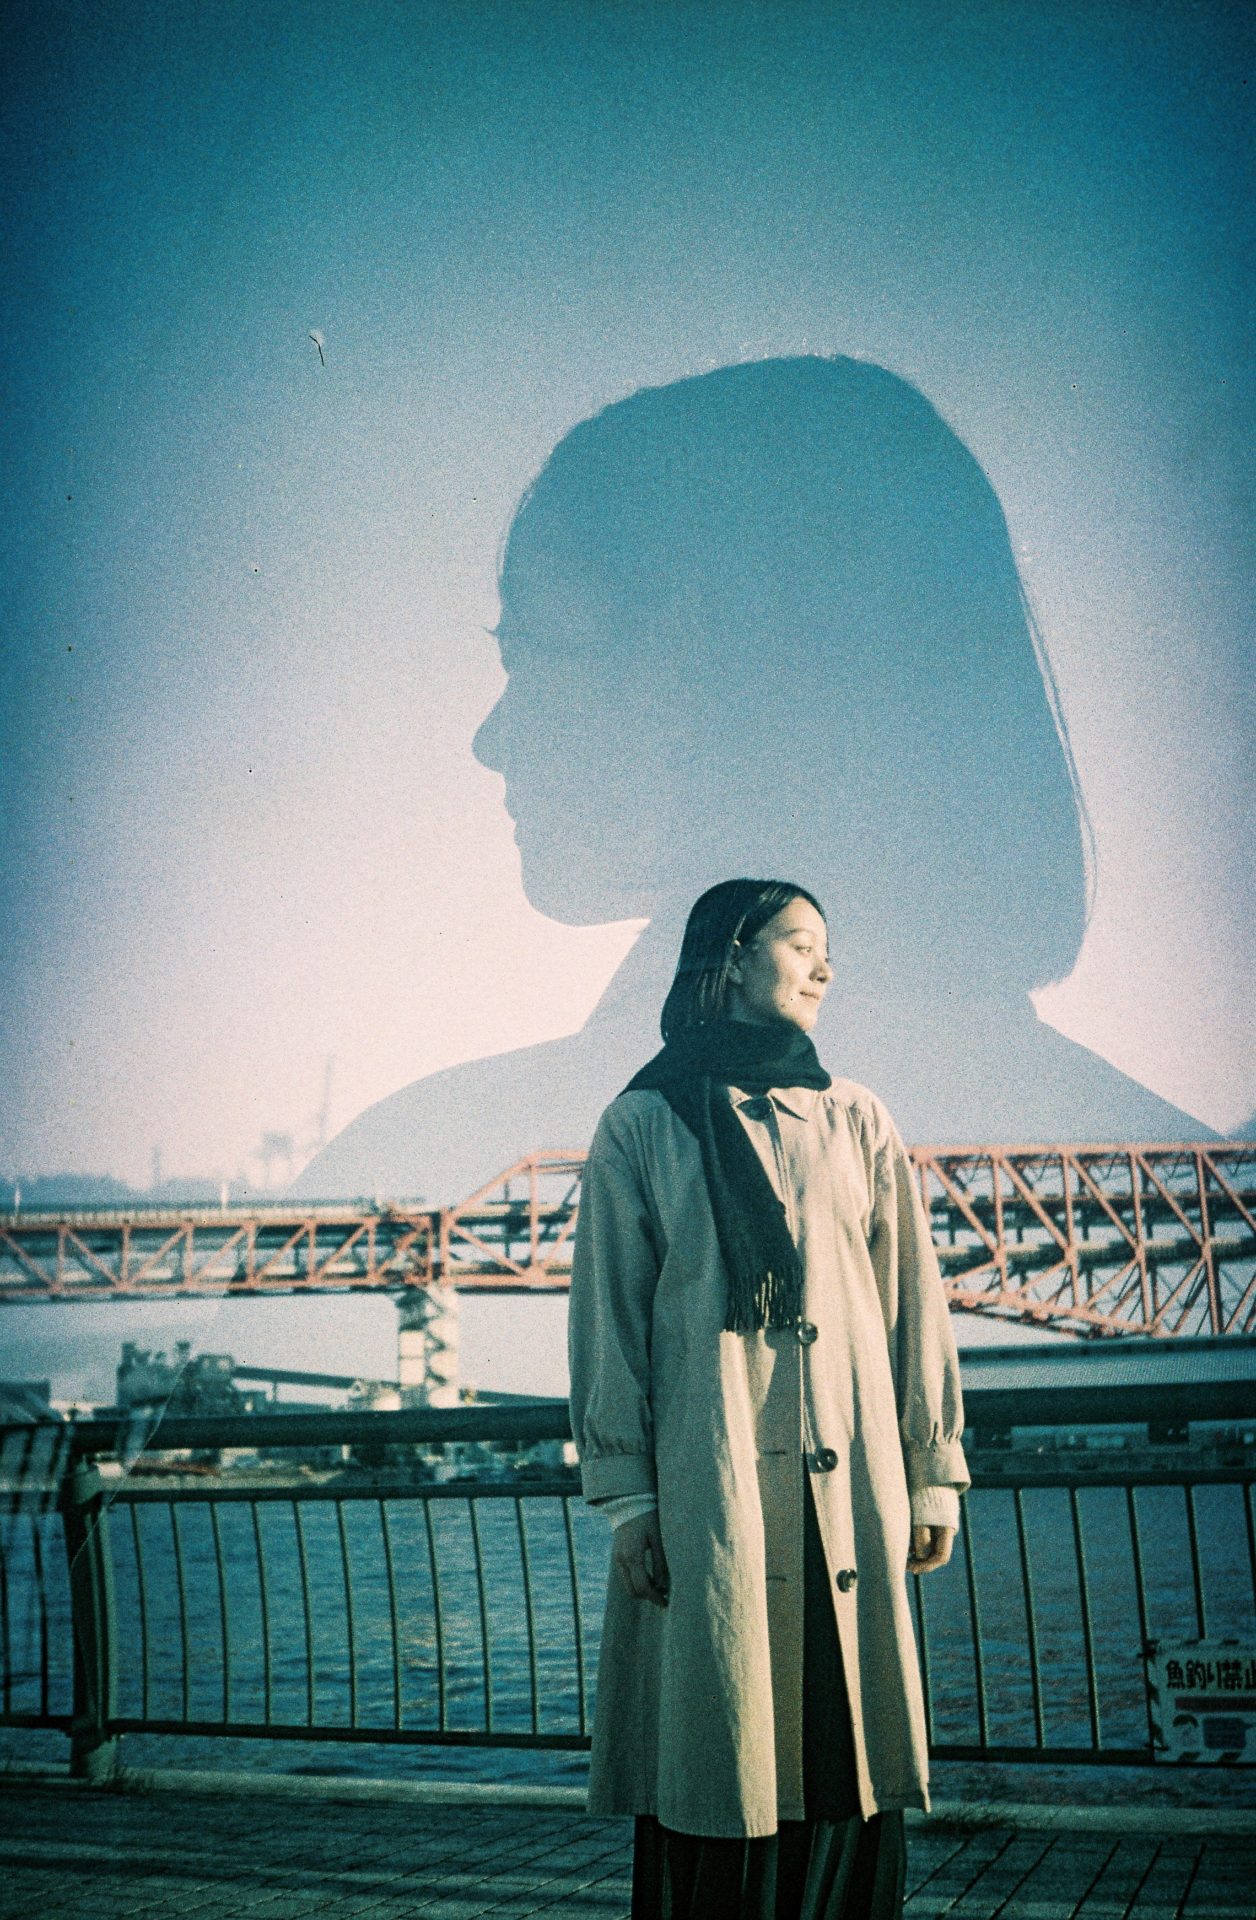
これまで自撮りをすることはほとんどありませんでしたが、MC-Aにはセルフタイマーが搭載されているので、「せっかくなら挑戦してみたい」と思いました。ただ、単純な自撮りではなく、Splitzerを使って自分自身を左右に配置する多重露光をやってみたかったのです。初めての試みではありましたが、ファインダーを覗きながら自分の立ち位置をしっかり決めたことで、イメージしていた通りの構図で撮影することができました。その再現性の高さも含めて、とても印象に残っています。
この写真は三脚を使用して撮影しているのですが、ここでもMC-Aの使い勝手の良さを実感しました。多重露光スイッチがカメラ上部に配置されているおかげで、三脚からカメラを外すことなくスムーズに撮影ができたのです。これは先述した通り、LC-A+では難しかったポイントで、この一枚はまさにその改良があったからこそ生まれた写真だと思っています。
また、ピントはあえてマニュアルフォーカスで合わせました。オートフォーカスだと背景にピントが引っ張られてしまいそうだと感じたため、自分に確実にピントを合わせたかったからです。
LOMO MC-Aは全ての人を満足させてくれる
Lomo MC-Aは、フィルムカメラ初心者から上級者まで、幅広い層が楽しめるカメラだと思います。
初心者の方であれば、プログラムオートやオートフォーカスを使うだけで、あとは被写体と向き合うことに集中できます。露出やピントをカメラに任せられるので、フィルムの装填さえきちんとできていれば、大きく失敗することはほとんどないはずです。フィルムカメラの入り口としても、とても安心感のある一台だと感じました。
一方で上級者の方にとっては、絞りやシャッタースピードをマニュアルでコントロールできる点が大きな魅力です。自分の意思をしっかり反映させながら撮影できるので、「考えて撮るフィルムカメラ」としてもしっかり応えてくれます。
そして忘れてはいけないのが、このMC-Aにはロモグラフィーらしい遊び心がきちんと詰まっているということ。多重露光やカラーフラッシュを使えば、人とは違う、自分だけの表現を思いきり楽しむことができます。私自身、このカメラの第一印象は「本気のカメラ」でしたが、使い込むほどに「やっぱりこれはロモグラフィーのカメラだな」と感じました。ただ美しい写真を残すだけでなく、ロモグラフィーのゴールデン10ルールを意識して、少しぶっ飛んだ撮影に挑戦すること。それこそが、MC-Aを一番楽しむ方法だと思います。


さて次回のブログでは多重露光の撮影についてもう少し深掘りをして紹介をします!どうぞお楽しみに!!
LOMO MC-A — Lomography’s Most Serious Camera Yet (First impression)
Lomography announced its new camera, the LOMO MC-A, in 2025. Ahead of its general release, I was asked by Lomography Japan to shoot sample images with the camera, and I contributed my review as an article for Lomography’s official magazine.
In this blog, based on that review, I’d like to dive a little deeper into multiple exposure photography and introduce this camera in two parts.
In this first post, I’ll share my overall impression of the MC-A and focus on the features that have never appeared in previous Lomography cameras.
My First Impression of the LOMO MC-A
The moment I took the MC-A out of its case for the first time, one thought immediately came to mind:
“Lomography has finally made a serious camera.”
Until now, Lomography cameras have been known for their playful spirit and experimental nature, deliberately keeping a certain distance from mainstream camera manufacturers. But the instant I saw the MC-A, that image was completely overturned. My honest first impression was, “This is a properly built camera that can stand confidently alongside other major brands.”
As I continued reading the manual and learning about its features, that initial surprise gradually turned into conviction. The MC-A firmly covers the fundamental performance that most camera users expect, while also preserving Lomography’s signature creative tools—multiple exposure, the Splitzer, and color flash.
I remember feeling genuinely excited, thinking, “This is an incredible camera…”
Three Shooting Modes: Program Auto / Aperture Priority / Manual
The MC-A introduces shooting modes that Lomography cameras have never had before: Program Auto, Aperture Priority Auto, and full Manual mode. I tested each mode and tried out various shooting styles.
First, in Manual mode, I experimented with long exposures using the Bulb function. The process is simple—just set the shutter speed dial to “B” and press the shutter. During bulb exposure, the LCD display shows the elapsed shutter time in seconds, allowing me to monitor exposure precisely rather than relying on intuition. This was a huge advantage. In fact, the MC-A is the only Lomography camera equipped with an LCD display. When shooting in bulb mode, using a tripod is highly recommended. The Ferris wheel photo shown below was taken using this function with a shutter speed of 4 seconds.
Next, since the shooting period coincided with peak autumn foliage, I used Aperture Priority to create images with beautifully blurred backgrounds. I was able to control the amount of bokeh exactly as intended, capturing expressive photos that fully conveyed the seasonal atmosphere. To shoot in this mode, set the shutter speed dial to “A” and choose an aperture between f/2.8 and f/16 using the aperture ring.
For this sample shoot, however, I mainly focused on multiple exposure photography, so I found myself using Program Auto most of the time. When working with multiple exposures, I tend to concentrate on conceptual ideas rather than exposure settings, so letting the camera handle exposure felt like a perfect match. To use Program Auto, set the shutter speed dial to “A” and the aperture ring to “P.”
New Features That Truly Helped
I tried many of the newly added features, but three stood out as especially useful in real shooting situations:
- Built-in Flash
- LCD Display
- Self-Timer
The built-in flash was particularly helpful for portrait photography. When using the LC-A+, I often shoot outdoors, and backlighting or deep shadows were always a challenge. With the MC-A’s built-in flash, I could clearly capture facial expressions even in difficult lighting conditions. It felt like I could confidently step into scenes that had previously been tricky with the LC-A+.
The LCD display, in my opinion, is a major evolution. Being able to clearly see the film counter is a huge advantage. With the LC-A+, the remaining frame count was somewhat ambiguous, but with the MC-A, it’s instantly visible. I frequently shoot multiple exposures using film swapping and carefully record which image is taken on which frame. The LCD display will be incredibly useful for keeping accurate records during that process.
The self-timer is another feature that proves useful in many situations. It allows for group photos, self-portraits, and shake-free shooting when pressing the shutter directly feels risky. Despite being a film camera, the MC-A truly expands creative freedom.
Although it’s not a brand-new feature, one change that personally made me very happy is the placement of the multiple exposure switch. On the MC-A, the switch is located on the top of the camera. For someone like me who frequently shoots multiple exposures, this is a significant improvement. On the LC-A+, the switch was on the bottom, which meant removing the camera from the tripod every time I took a shot. That frustration is completely eliminated with the MC-A. This change alone made me feel that the camera was designed with serious multiple-exposure shooters in mind.
My Favorite Shot from This Shoot
My favorite image from this session was created by combining the following features:
- Multiple Exposure
- Splitzer
- Self-Timer
- Manual Focus
I rarely shoot self-portraits, but since the MC-A includes a self-timer, I thought, “This is a good chance to try.” Rather than a simple self-portrait, I wanted to use the Splitzer to create a multiple exposure placing myself on both the left and right sides of the frame. Although it was my first attempt, carefully positioning myself while looking through the viewfinder allowed me to achieve exactly the composition I had imagined. The high level of reproducibility left a strong impression on me.
This photo was shot using a tripod, and once again I felt how user-friendly the MC-A is. Thanks to the top-mounted multiple exposure switch, I was able to shoot smoothly without removing the camera from the tripod. As mentioned earlier, this was difficult with the LC-A+, and this image truly exists because of that improvement.
I also chose to focus manually. With autofocus, I felt the camera might pull focus toward the background, so I wanted to be absolutely certain that the focus was locked on myself.
The LOMO MC-A Satisfies Everyone
I believe the LOMO MC-A is a camera that can be enjoyed by everyone—from film photography beginners to advanced users.
For beginners, simply using Program Auto and autofocus allows them to focus entirely on their subject. With exposure and focus handled by the camera, as long as the film is loaded correctly, it’s unlikely they’ll make major mistakes. It feels like a very reassuring entry point into film photography.
For advanced users, the ability to manually control aperture and shutter speed is a major attraction. The MC-A responds well as a “thinking photographer’s film camera,” allowing full creative intention to be reflected in each shot.
And of course, we can’t forget that the MC-A is packed with Lomography’s signature sense of play. With features like multiple exposure and color flash, you can fully enjoy creating images that are uniquely your own. My first impression of the MC-A was that it was a “serious camera,” but the more I used it, the more I felt, “Yes—this is unmistakably a Lomography camera.”
It’s not just about taking beautiful photos. Embracing Lomography’s Golden Rules and daring to experiment a little—that’s the best way to truly enjoy the MC-A.
In the next blog post, I’ll dive even deeper into multiple exposure techniques. Stay tuned!


[…] ラについて紹介したいと思います。2回目の今回は多重露光の撮影方法について動画を交えて深掘りしてお伝えします。全体の印象を紹介した1回目のブログはこちらからご覧ください。 […]